[Review]Which Kase Filters Are Used for Astrophotography?
Share
Release time:2024-11-25
Original article link:https://www.constantinethemelis.com/blog/filters-astrophotography
Filters for landscape astrophotography?
24 May
Written By Konstantinos Themelis
Intro
Astrophotography is a fascinating branch of photography that focuses on capturing stunning images of celestial objects and phenomena. There are two primary types of astrophotography: landscape astrophotography and deep-sky astrophotography. The former involves capturing the night sky and terrestrial objects such as mountains, lakes, and trees. It showcases the night sky's beauty in contrast to the natural landscape. On the other hand, deep-sky astrophotography is focused on capturing distant celestial objects, such as galaxies, star clusters, and nebulas. This type of astrophotography requires specialized equipment and techniques to capture faint, distant objects.
There are several types of filters that astrophotographers use for deep sky astrophotography. One of the most common is a light pollution filter, which helps to block out light from artificial sources such as streetlights, buildings, and car headlights. Another popular option is a narrowband filter, which allows only certain wavelengths of light to pass through and captures specific details on nebulae. There are also filters designed to enhance certain colours, such as a hydrogen-alpha filter that enhances the red hues of nebulae. Lastly, there are UV/IR cut filters which block out ultraviolet and infrared light, improving the overall clarity and sharpness of the image. Each filter has its unique benefits and drawbacks, and astrophotographers need to choose the right filter.
Kase filters
A few months ago I contacted Kase Filters Global and asked them if I could try, test and review some of their filters. Their response was very positive and they gladly sent me 3 filters.
Kase Wolverine Neutral Night Light Pollution Filter with Magnetic Adapter
Kase Wolverine Precision Focus Tool with Magnetic Adapter
Kase Dream Star Effect Astro Filter 100x100mm
Disclaimer: I was not paid to make this review and they asked for my 100% honest opinion
The first two filters are coming from their new Wolverine line. The special feature of these filters is the magnetic circular adapter that screws in front of your lens and you just pop the filter right in, without any effort. All astro-geeks know that setting something during the night is really hard and sometimes it leads to accidents. So the easier the placement, the better. I also used them with gloves on and I had no problem screwing the adapter. There are three sizes, 77mm, 82mm and 95mm. But if you don’t have any of these sizes you can get very cheap lens steppers from Amazon. I got the 77mm version.
00:00
Kase Neutral Night - Light Pollution Filter (LP)
These filters work by blocking specific wavelengths of light emitted by artificial light sources such as streetlights and buildings. This allows cameras to capture details of the night sky that would otherwise be obscured by the brightness of city lights. There are several types of light pollution filters. Each filter has its own unique advantages and disadvantages, and it is important to choose the right filter for the specific conditions. The Kase Neutral Light is one of these filters. I have to be honest. I’m not a huge fun of LP filters. I prefer taking images from a dark sky. Nothing can replace a good dark sky in landscape astrophotography.
Things that you should expect from using an LP filter:
Your images will be slightly darker, which is normal because you block specific wavelengths of light
Your images will have (most of the time) a blue colour cast, which can be fixed easily by tweaking the White Balance in your preferred post-processing software
You should not expect crazy cool results. These filters are not dark enough because they are meant for landscape astrophotography. If they blocked most of the LP that would mean much much darker pictures, thus a major need for longer exposures.
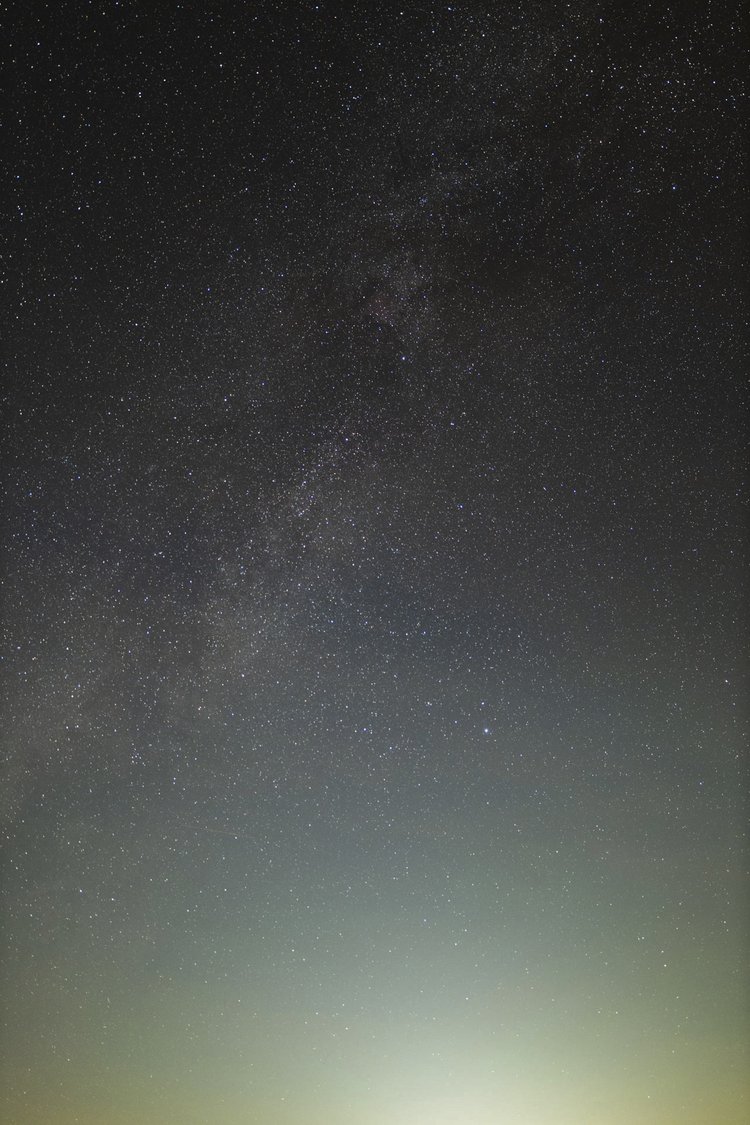
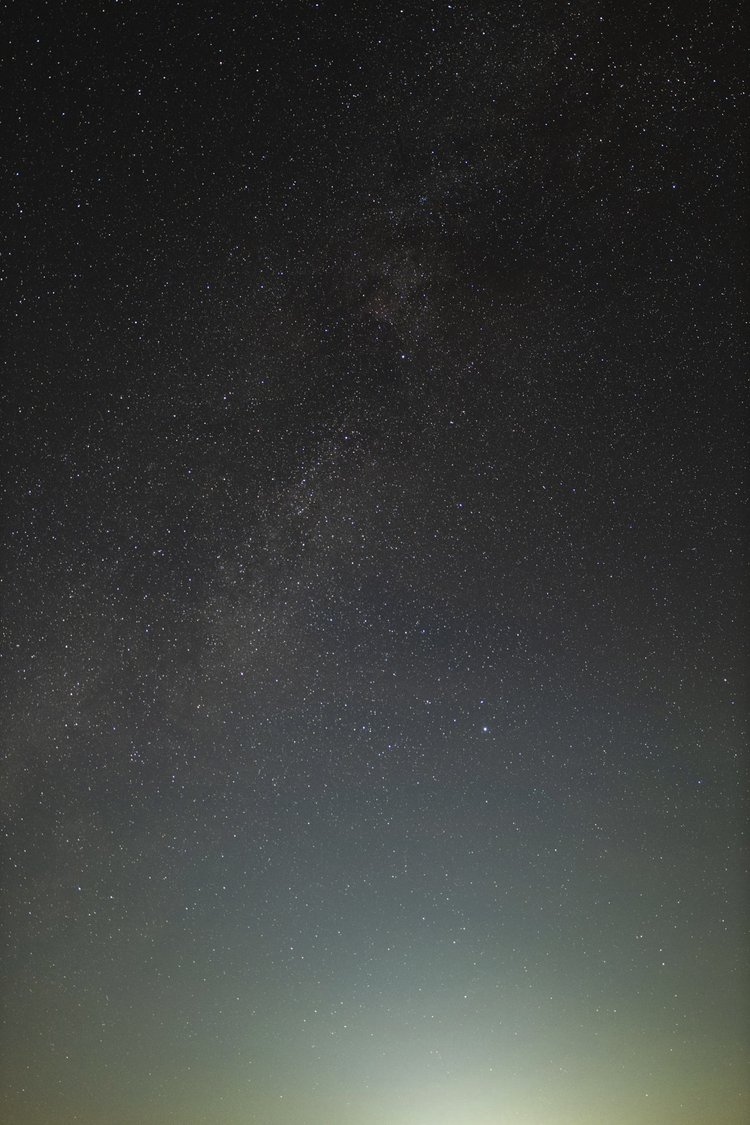
Let’s see the first test which is the hardest as I placed the light source in front of me. I travelled around 40 minutes away from my hometown and I pointed my camera towards the city lights.
RAW file without LP filter
RAW file with LP filter
Ok, let’s fix the white balance on both images. As I told you before, you won’t see a huge improvement, but the LP is in fact reduced, giving much more contrast to the sky.
Image without LP filter
Image with LP filter
Let’s apply a strong contrast curve and reduce Highlights at -100 in Camera Raw.
Image without LP filter
Image with LP filter
We can get a little better color contrast at the nebulae areas and have more space to edit the image.
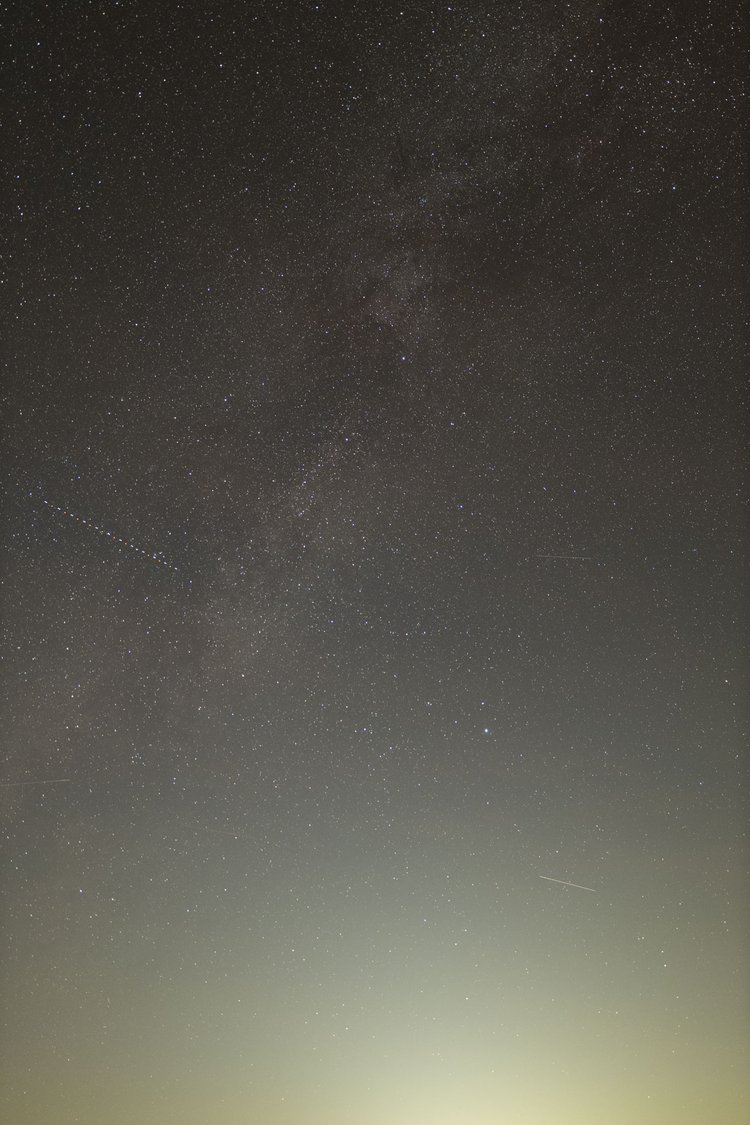
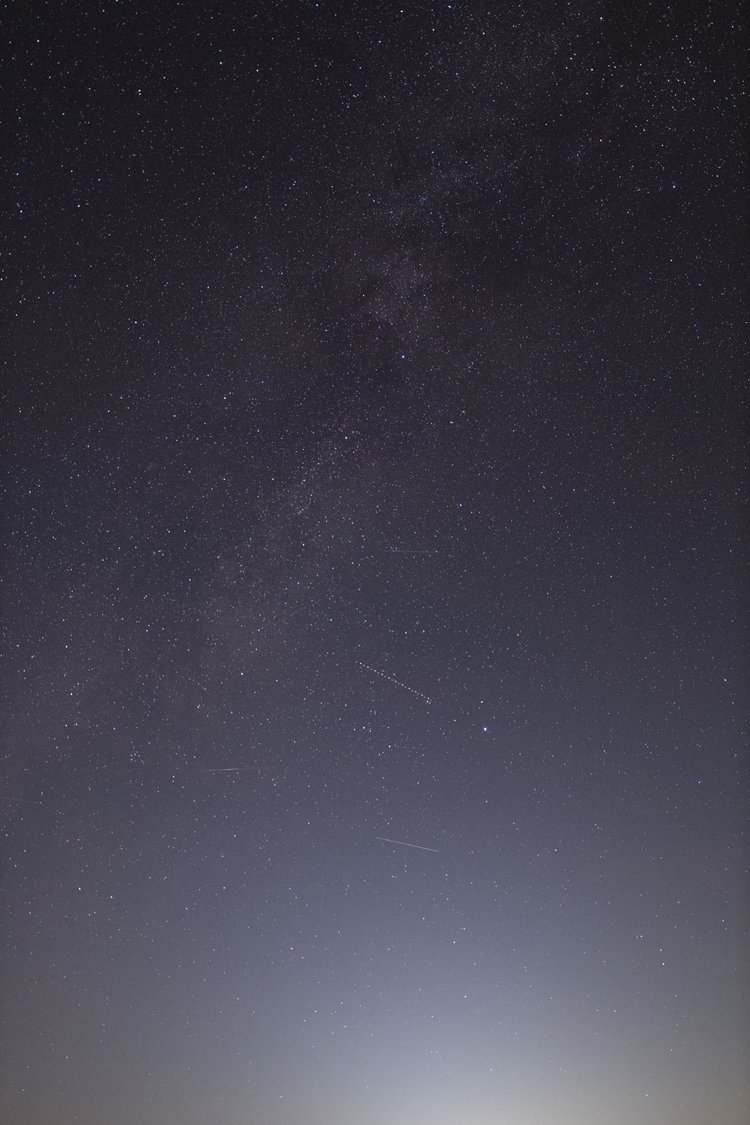
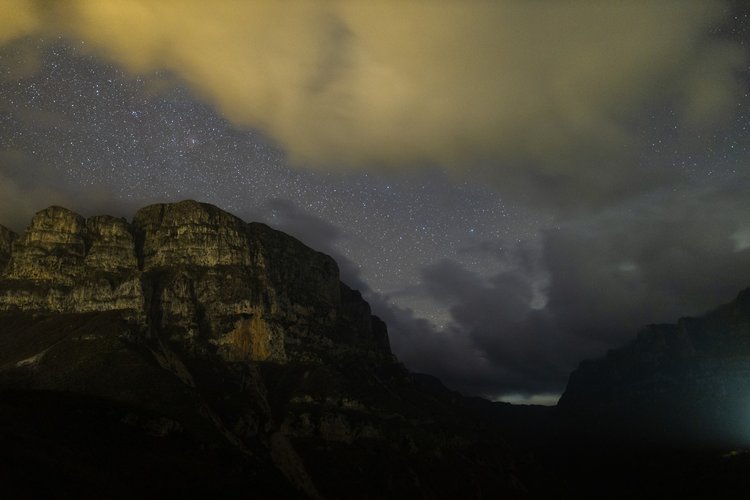
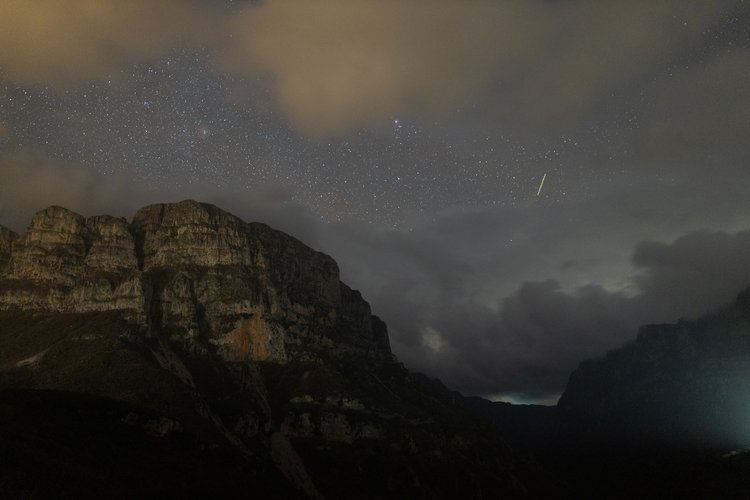
For the second test, I went to Zagori Gorge in northern Greece. The light pollution only derives from any nearby villages. One would say that you don’t really need an LP filter, but I met a case where it was useful.
The following results have common edit parameters. You can click on the images to get better details.
Fix WB based on the sky
Tweak the exposure of the LP image to match the original one
Image without LP filter
Image with LP filter
As yellow (warm) light is blocked you can easily get rid of scattered light pollution in the atmosphere and get a better straight-out-of-camera result (SOOC). Finally, I didn’t find any aberrations caused by the filter. Some of my latest shots were made with Neutral Night.
Verdict
I can totally say that there is a difference and the filter is working, but it’s not for me. I travel to remote places where you can’t see any distant light for miles. Also, if there is any light source on the scene, I can reduce it on post-processing with luminosity masks.
Who is this filter for?
This filter can be useful for people who live near light-polluted areas and they want a fast way to reduce the yellow hues and excess brightness on their images. Moreover, it’s really good for people who just take images with minimal to no post-processing.
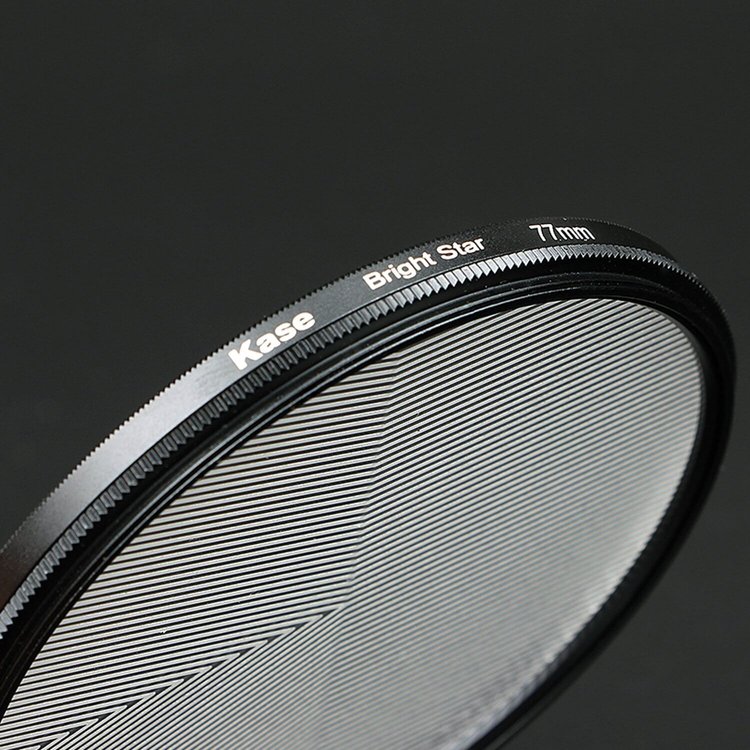
Kase Wolverine Precision Focus Tool
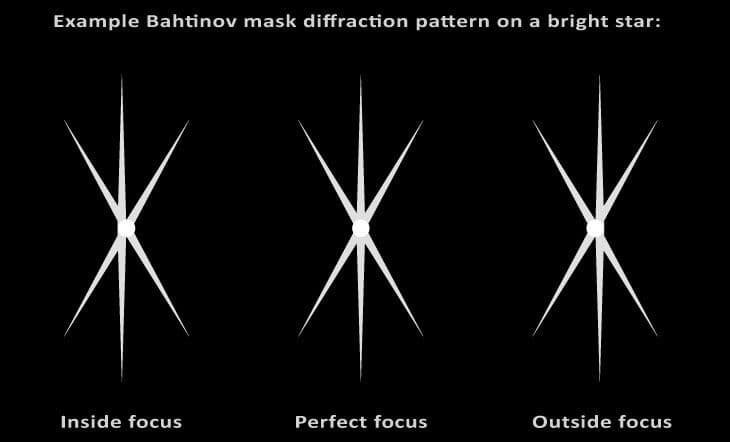
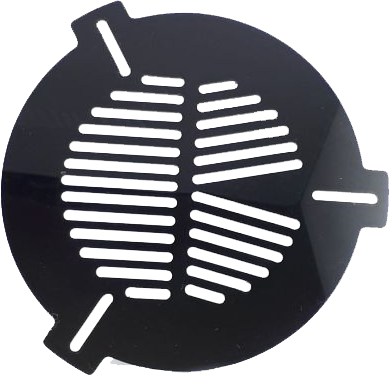
The whole idea behind this product is based on how a Bathinov mask works. A Bathinov mask is a filter/tool used in astrophotography to help achieve proper focus. It consists of a main circular aperture and a series of diffraction spikes radiating outwards from the center of the aperture. To use the Bathinov mask, a photographer would place it over the front of the telescope or camera lens and aim it at a bright star or planet.
Telescope mask (Copy)
Kase Filter version (Copy)
Play
00:09
00:09
Mute
Settings
Enter fullscreen
00:00
Verdict
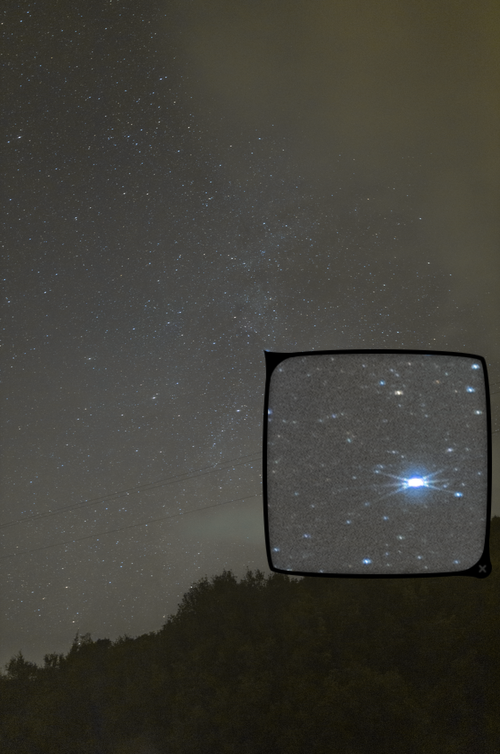
There is not much to talk about here as it’s a really simple tool. However, the mask is not really appropriate for focusing on a wide-angle lens, as the stars appear very small which you can confirm in the very cropped video that I shot with my Sigma 28mm while having the focusing mask on.
Who is this filter for?
If you want to have perfect focus every time and your full frame equivalent focal length is 40mm and above this is the tool for you. Moreover, some people struggle with seeing at night. Many buy magnifying glasses which are placed on the LCD of the camera to check if the stars are in focus. With this filter, you’re 100% covered.
Kase Dream Star Effect Astro Filter
Spoiler alert: this is my favourite!
The dream star filter is basically known as a fog filter. This is a type of filter that creates a soft and dreamy effect by diffusing light. It works by scattering and reflecting light. Ok, so why is this my favourite filter? While taking images of constellations, the milky way and panoramas, most of the stars are reduced in size. For example, let’s say you want to capture the Ursa Major constellation above a beautiful landmark. Using a fog filter is the way to make the brightest stars stand out, revealing the impact of the constellation. You can do it in post, but nothing beats the natural star glow. Kase Filters asked me if I wanted the 100x100 filter holder, but most of the time I just hold it in front of my lens.
The longer you hold the filter, the most intense the effect is.
Play
00:04
00:04
Mute
Settings
Enter fullscreen
00:01
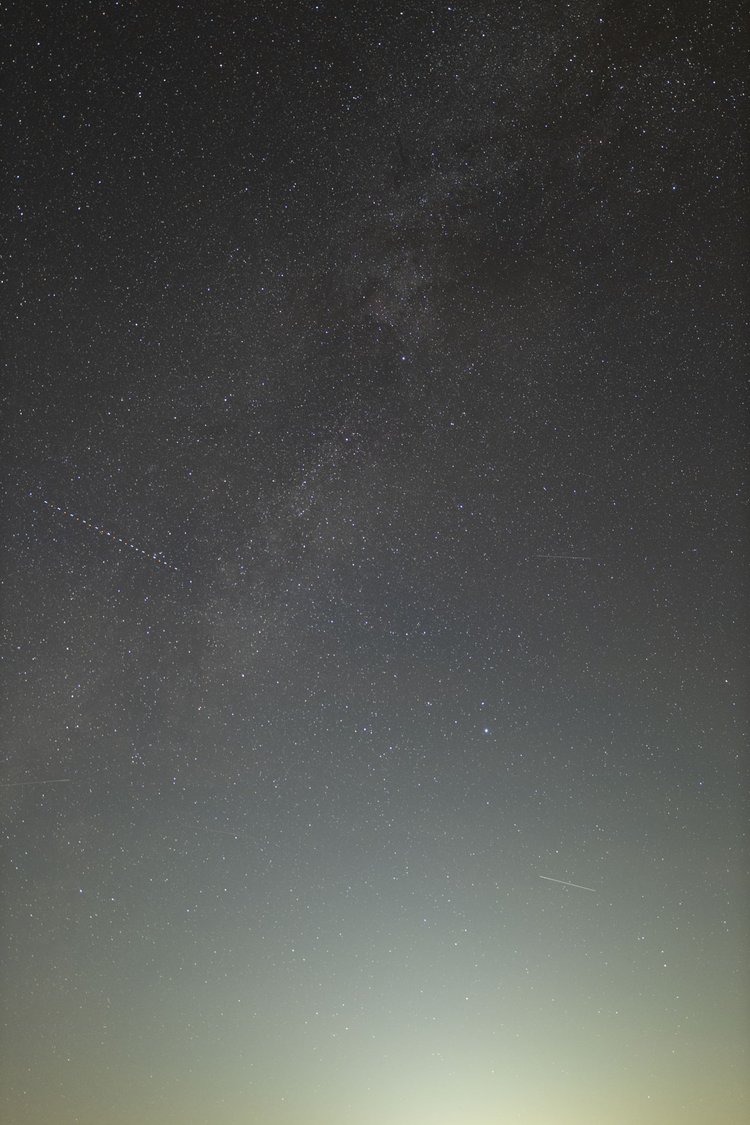
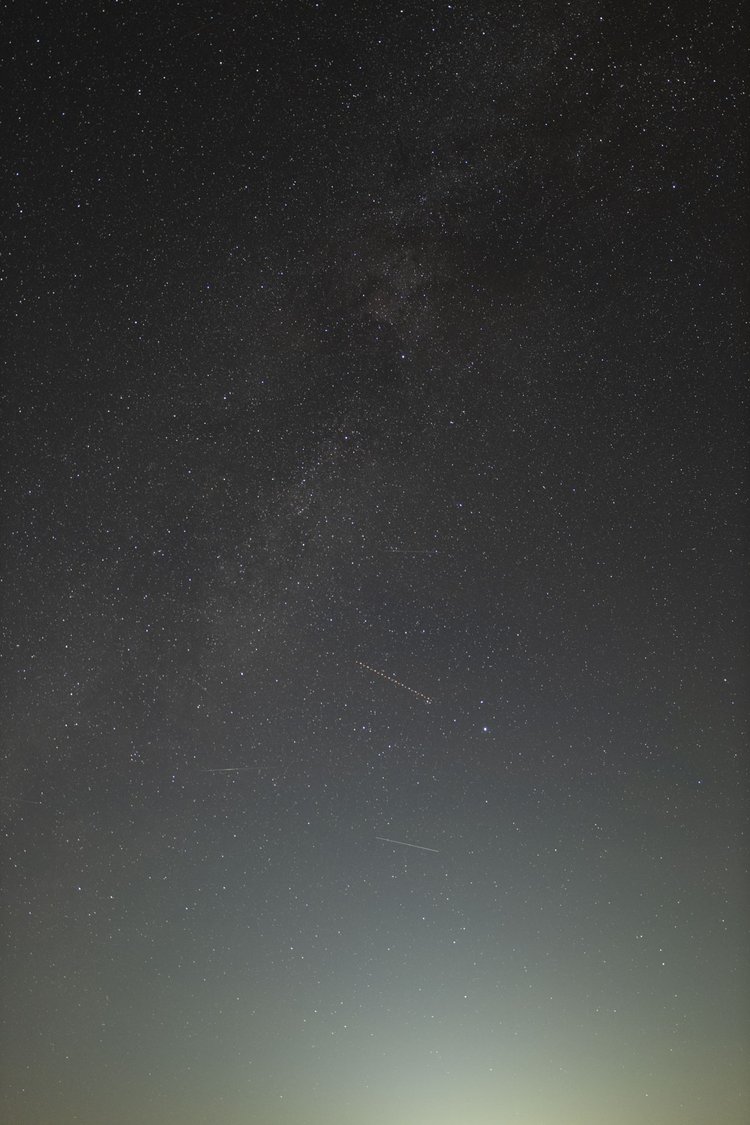
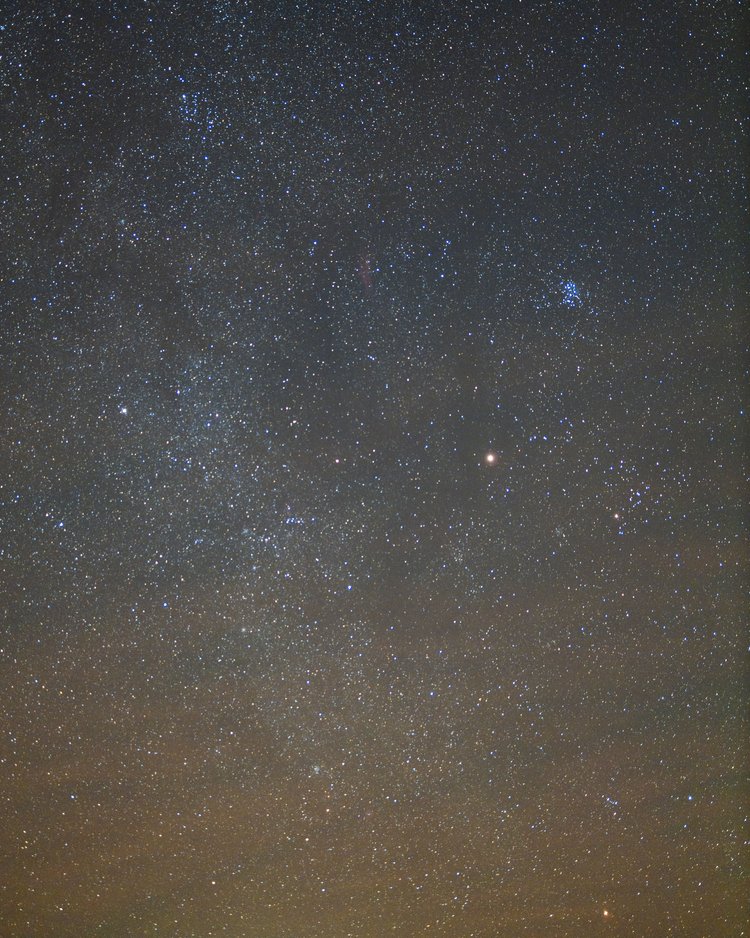
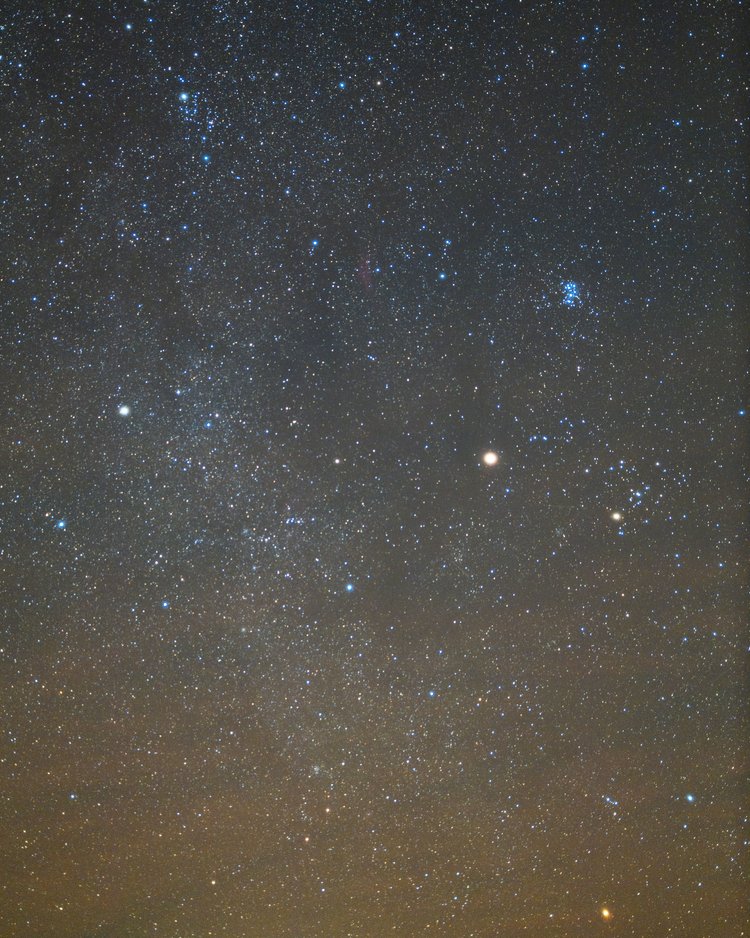
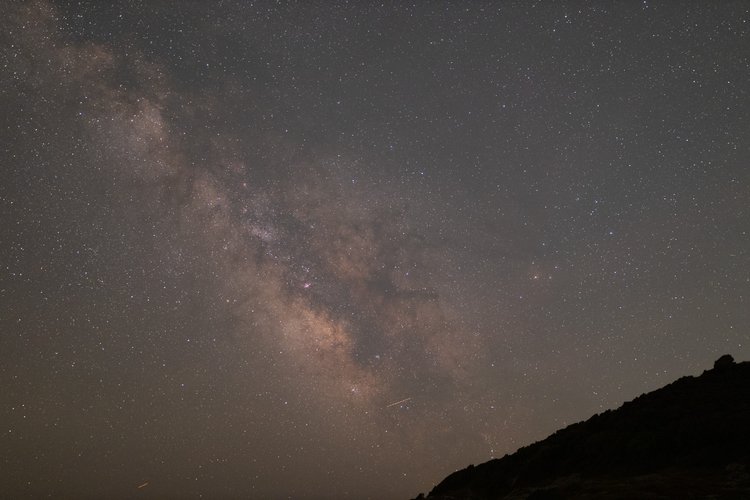
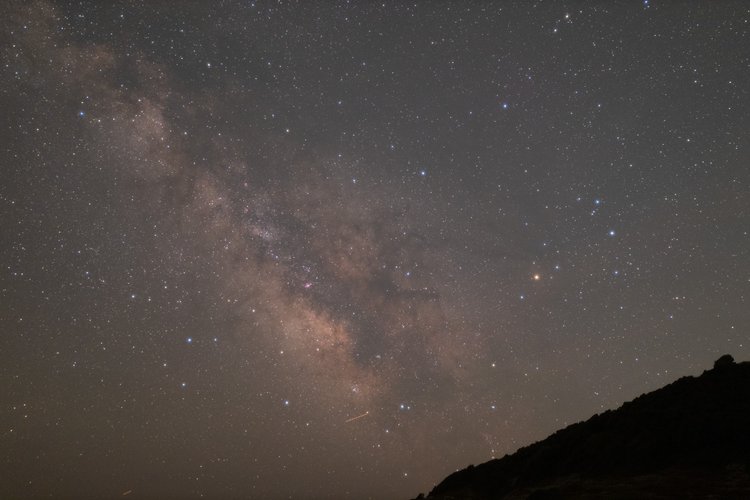
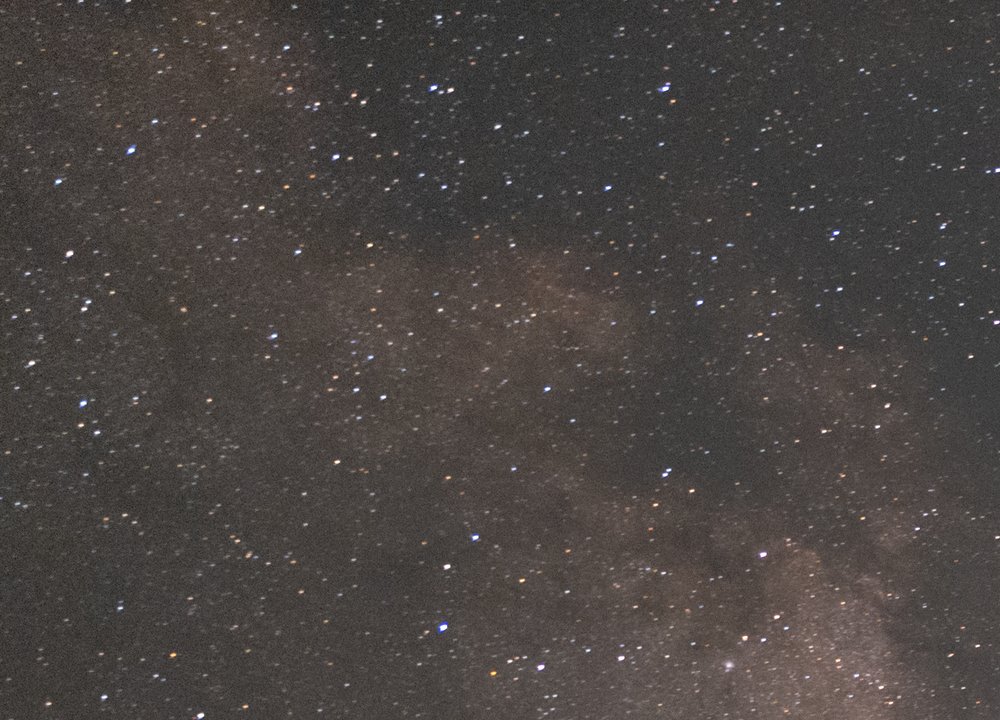
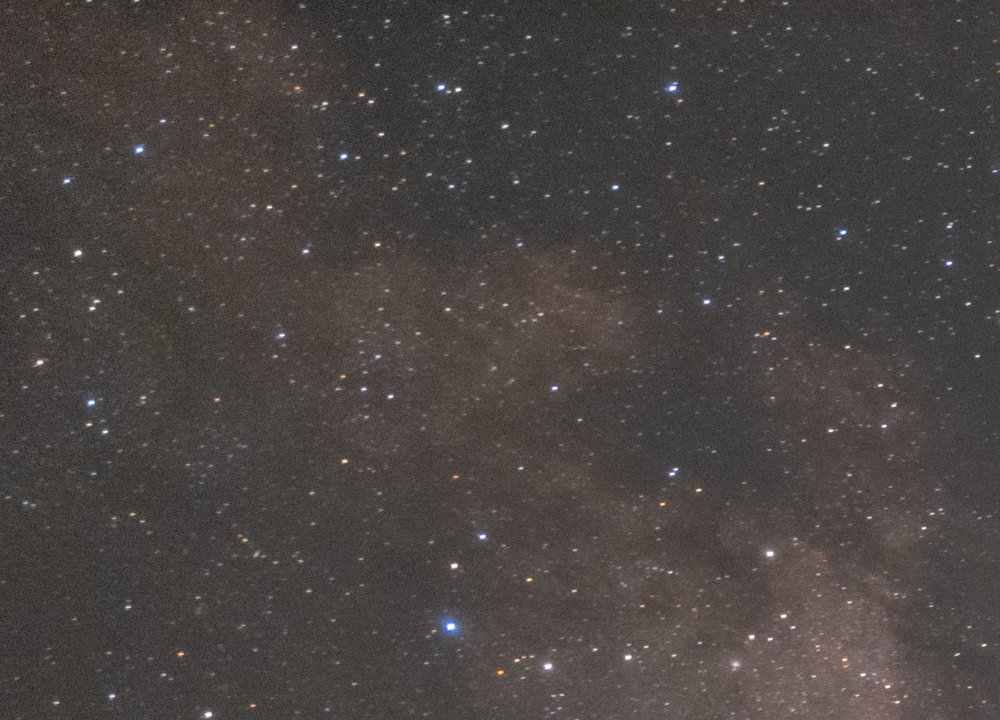
You can click on the images to get better details. Only WB is fixed.
No filter
Dream Star ON
No filter
Dream Star ON
How I use it
I don’t need all the bright stars on my image to be enhanced, so I take two exposures like the above images. A regular one and one while holding the filter. Then, I open them in Adobe Photoshop as layers, keeping only the stars that I want. By doing so, I achieve the best result in my opinion.
By using and testing the filter I didn’t notice any cause of aberrations. In fact, because of the dreamy effect, some of your lens aberrations may be smoothed out. Check the comparison below (400% crop on top left corner)
Verdict
I always wanted to get one of these filters on my hands. They can greatly improve your result and make it more impactful. I use it 8/10 times when I’m on the field, depending on the project and the final image that I have in my mind.
Who is this filter for?
It’s for every astrophotographer out there. I think it’s a very handy tool especially if you shoot panoramas, where stars are squeezed, planets and star clusters.
Conclusion
If someone asked me which of these filters should buy for landscape astrophotography, I would suggest:
Kase Dream Star (10/10). You can boost your inner creativity!
Kase Focusing Mask (8/10). It’s not very practical for ultra-wide shots. However, 40mm and above can benefit from its usage.
Kase Neutal Night LP Filter (5/10). It’s better to shoot from dark-sky locations. However, it’s good for people who don’t want to edit their images and live in light-polluted areas.
Suggestions - Improvements
By using these tools I want to write a few suggestions that may make the filters even better and useful.
Kase Focusing Mask. Have different filters depending on a focal length range. For example, we can have different filters for 16-35mm, 40-85mm, 135mm-above (if that’s possible). I would love to have one filter that works with all my lenses but somewhere, right now, an engineer is reading and laughing.
Kase Neutal Night LP Filter. We could have different versions of this filter, each one constraining more light pollution. It’s the same way as in narrowband astrophotography where you can have 3nm, 6nm, 12nm filters which block different amounts of light.
Related News

![[Review]The user experience of the Kase Reflex Lens 200mm [Review]The user experience of the Kase Reflex Lens 200mm](/npublic/img/s.png)


