Detail
Kase Sony Clip in 4 in 1 Set Review by Jörgen van Beem
- Categories:Review
- Author:Jörgen van Beem
- Origin:
- Time of issue:2020-11-05 16:54
- Views:
(Summary description)

Kase Sony Clip in 4 in 1 Set Review by Jörgen van Beem
(Summary description)
- Categories:Review
- Author:Jörgen van Beem
- Origin:
- Time of issue:2020-11-05 16:54
- Views:
Product review
KASE CLIP-IN FILTER SONY A7 4 IN 1 SET (MCUV+ND8+ND64+ND1000)

Introduction
A while ago I got the opportunity to review and test a new filter system KASE introduced on the market. Where most people are familiar with the screw-on filters and with the square (stackable) filters,
KASE went one step further introducing clip-in filters.
They designed different versions of this filter, for 4 camera brands: Sony Alpha, Canon, Fujifilm and Nikon cameras. For Sony the filters can be applied on any Sony Alpha 7/9-series camera and any lens
combination. For Canon, Nikon and Fujifilm, KASE launched separate filters for specific camera-lens combinations.
I will review the “4 in 1” filter set on my Sony A7R III camera.
The 3 included ND filters provide 3, 6, and 10 stops of light reduction, allowing for better control of shutter speeds to compose the desired level of depth of field or motion blur, even in
very bright circumstances. The UV filter protects the camera sensor when changing lenses and also adds a multicoated layer reducing UV haze.
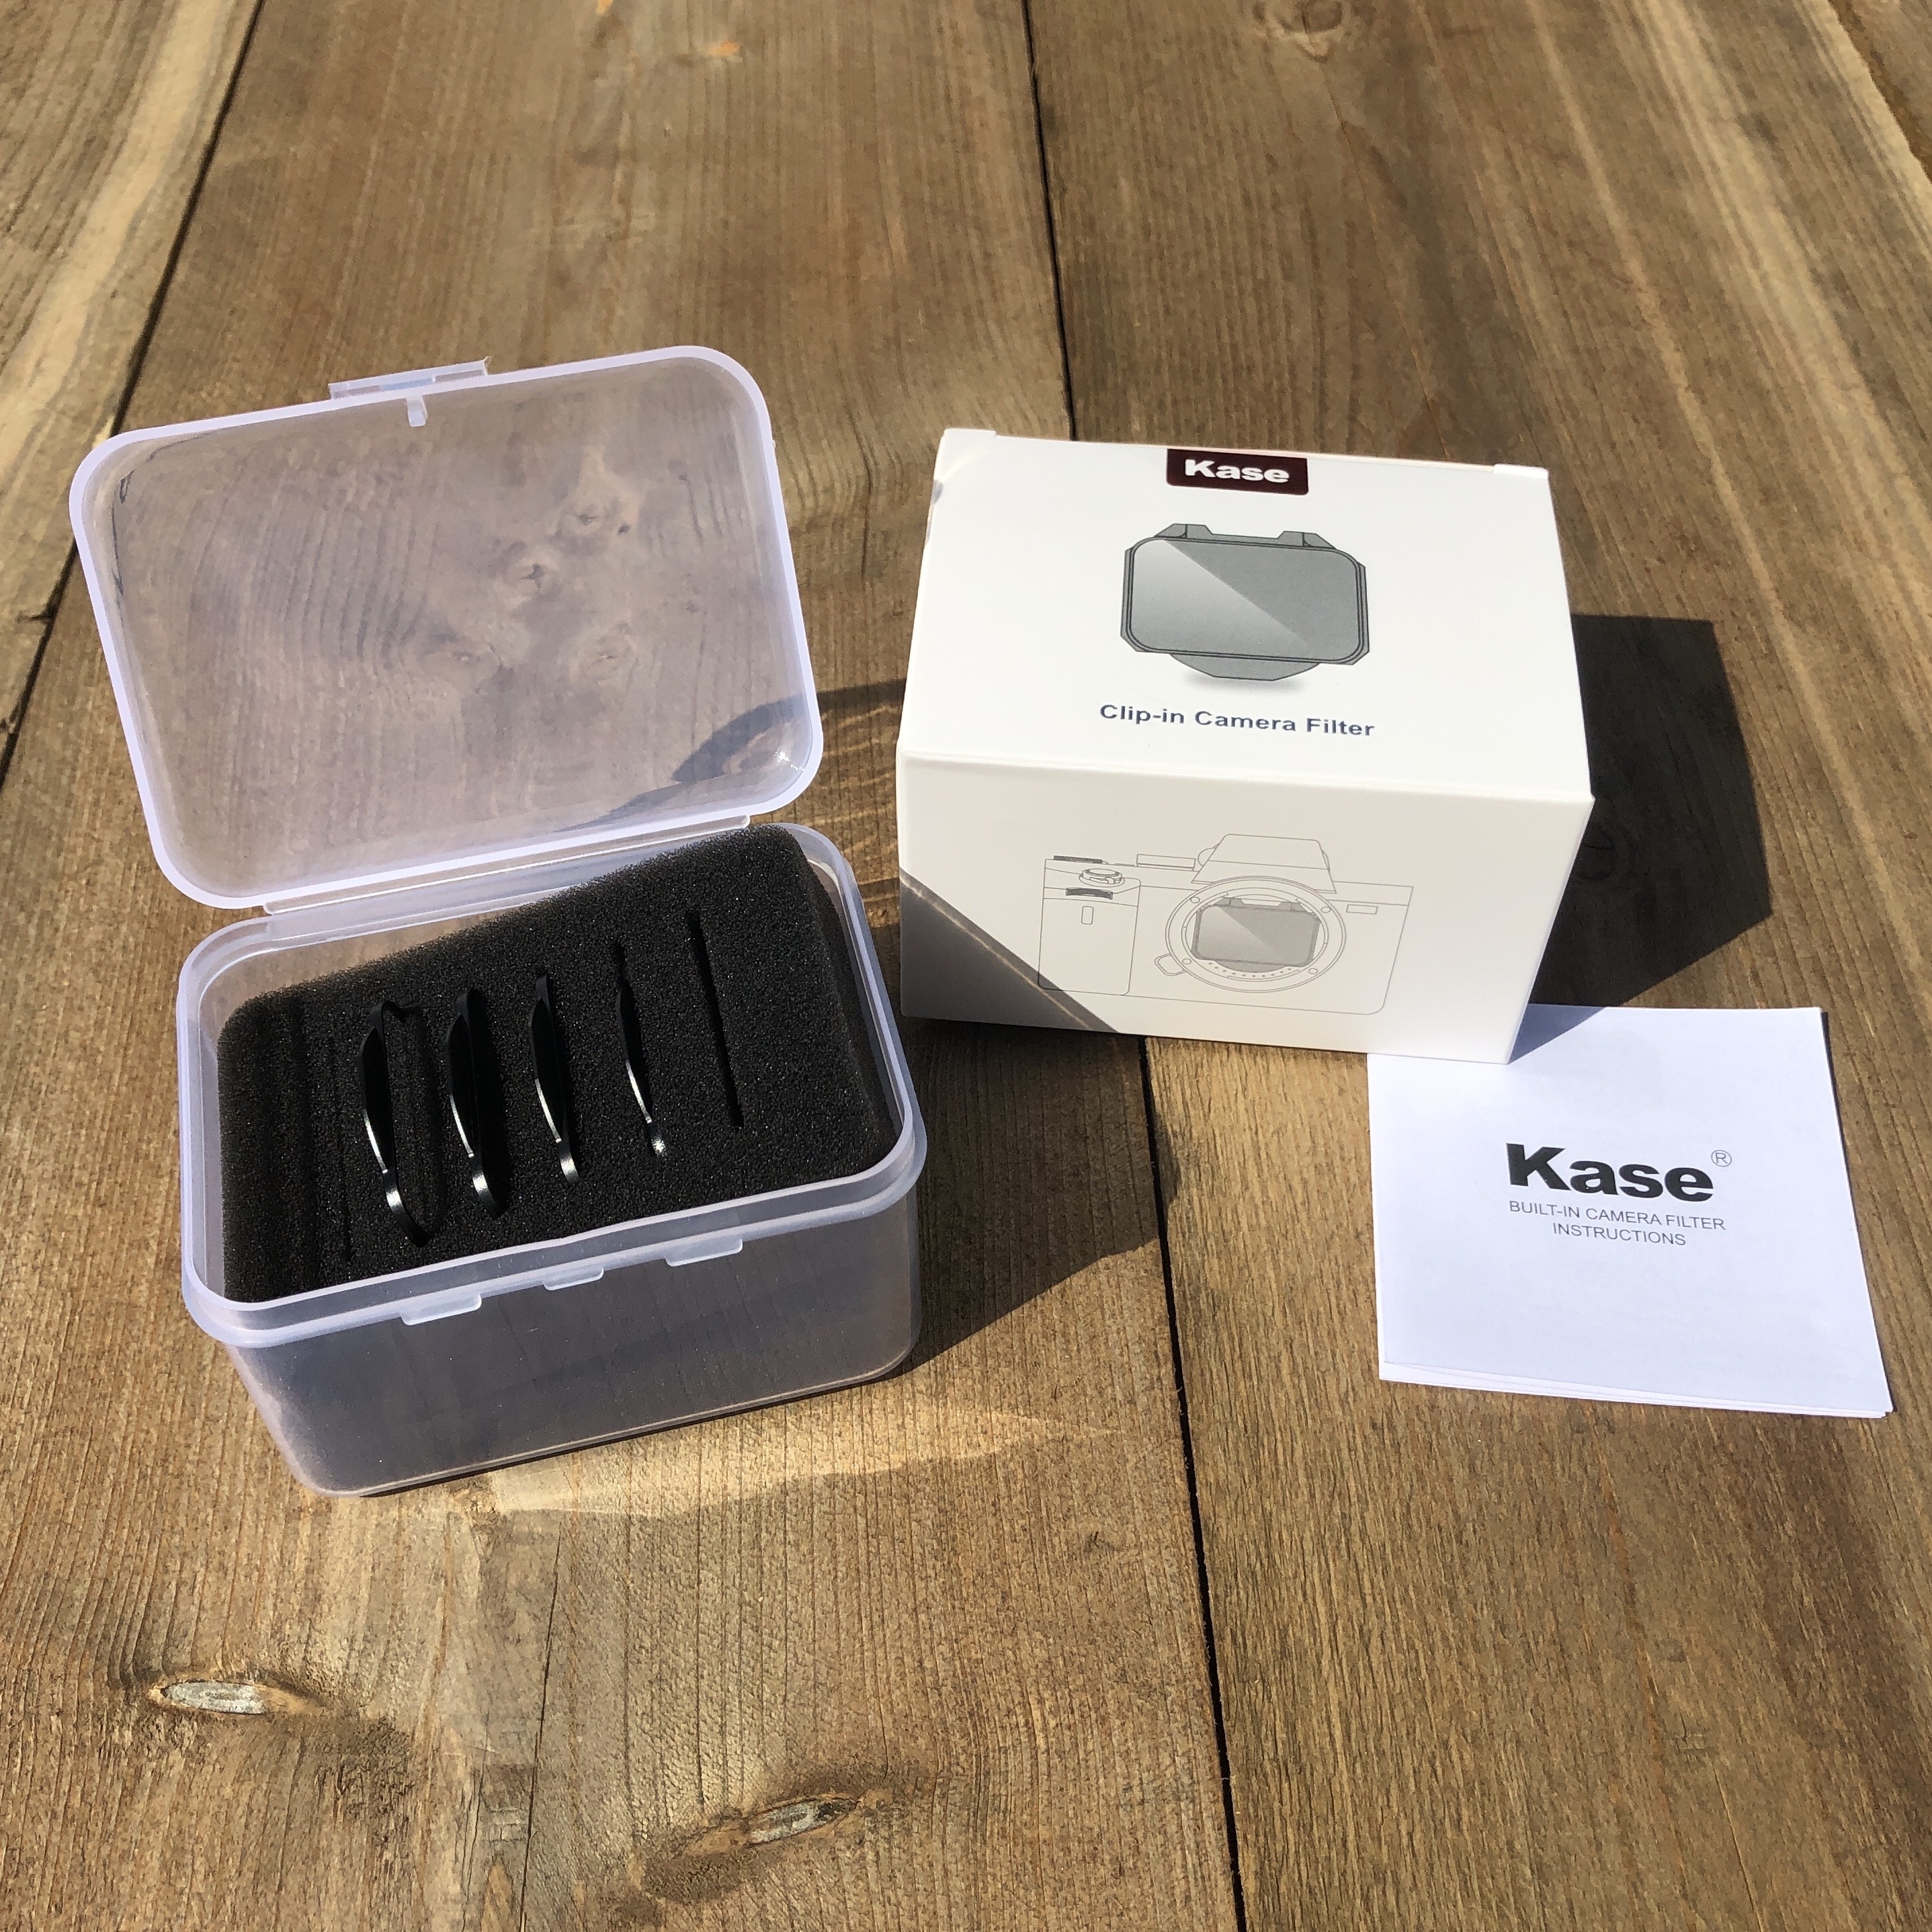
Unboxing
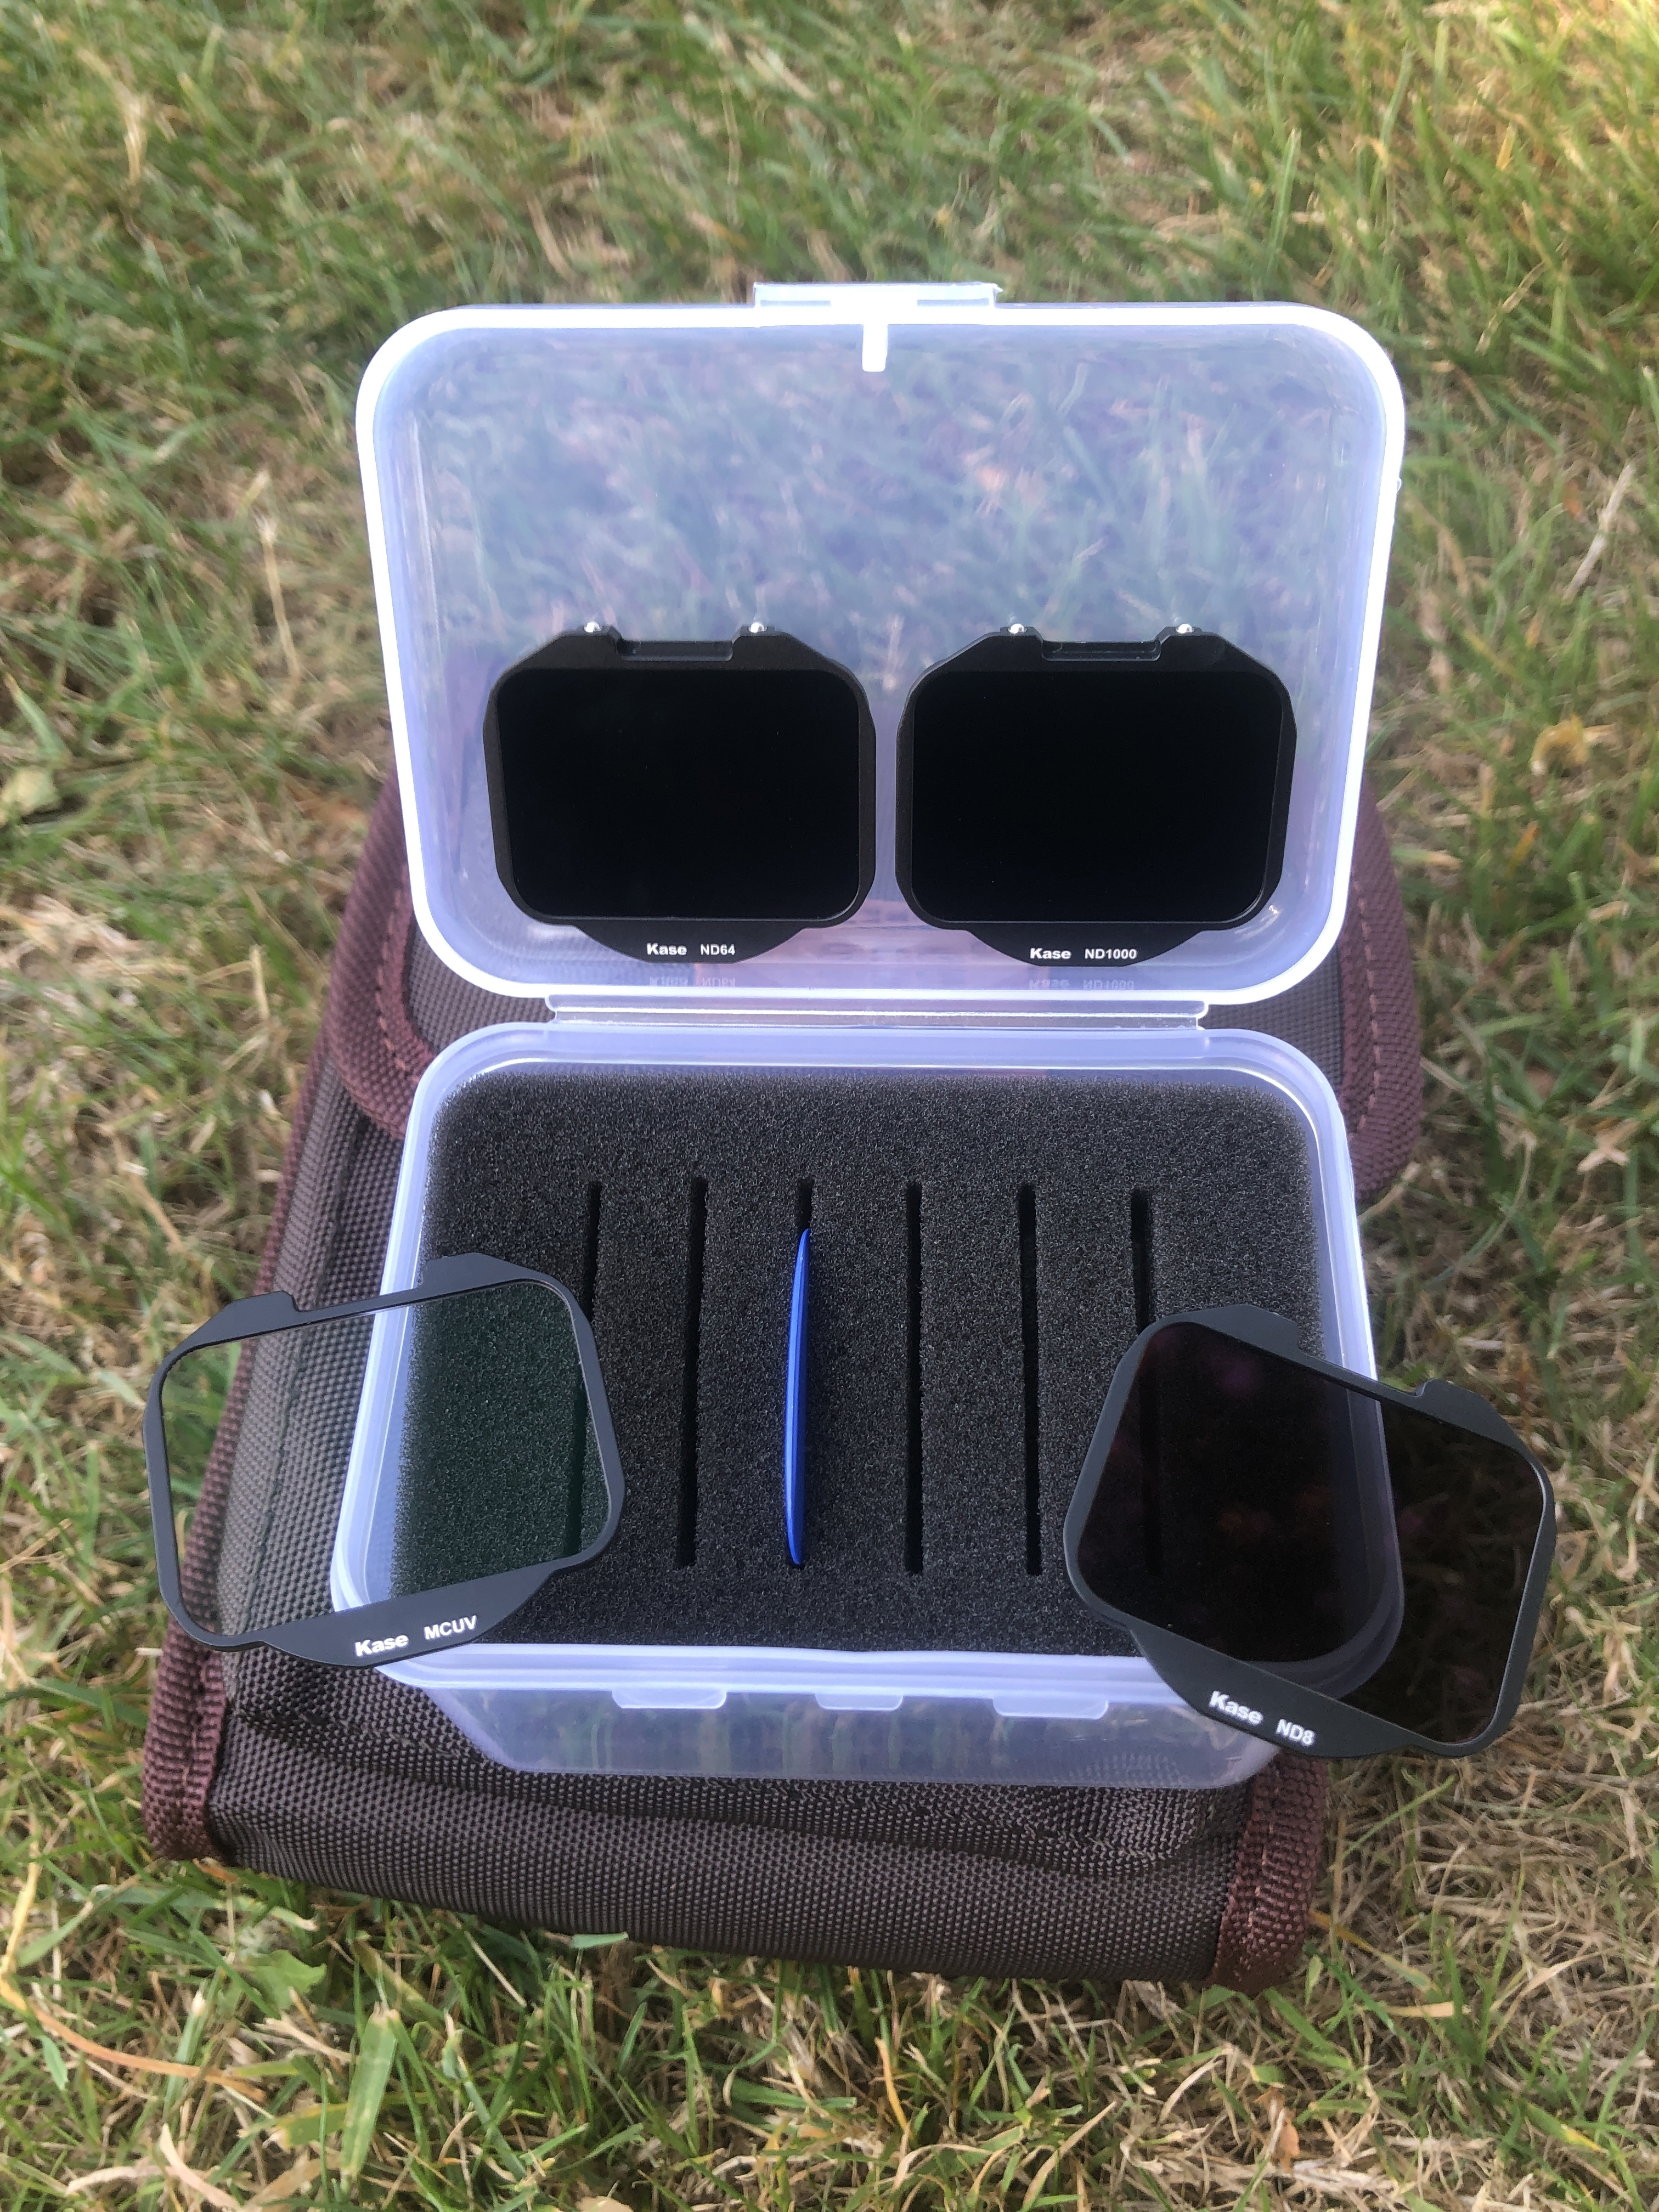
As with all KASE filters, also this filter set comes in a nicely designed carton package. In the box you find:
- KASE UV protection filter
- KASE ND8 filter
- KASE ND64 filter
- KASE ND1000 filter
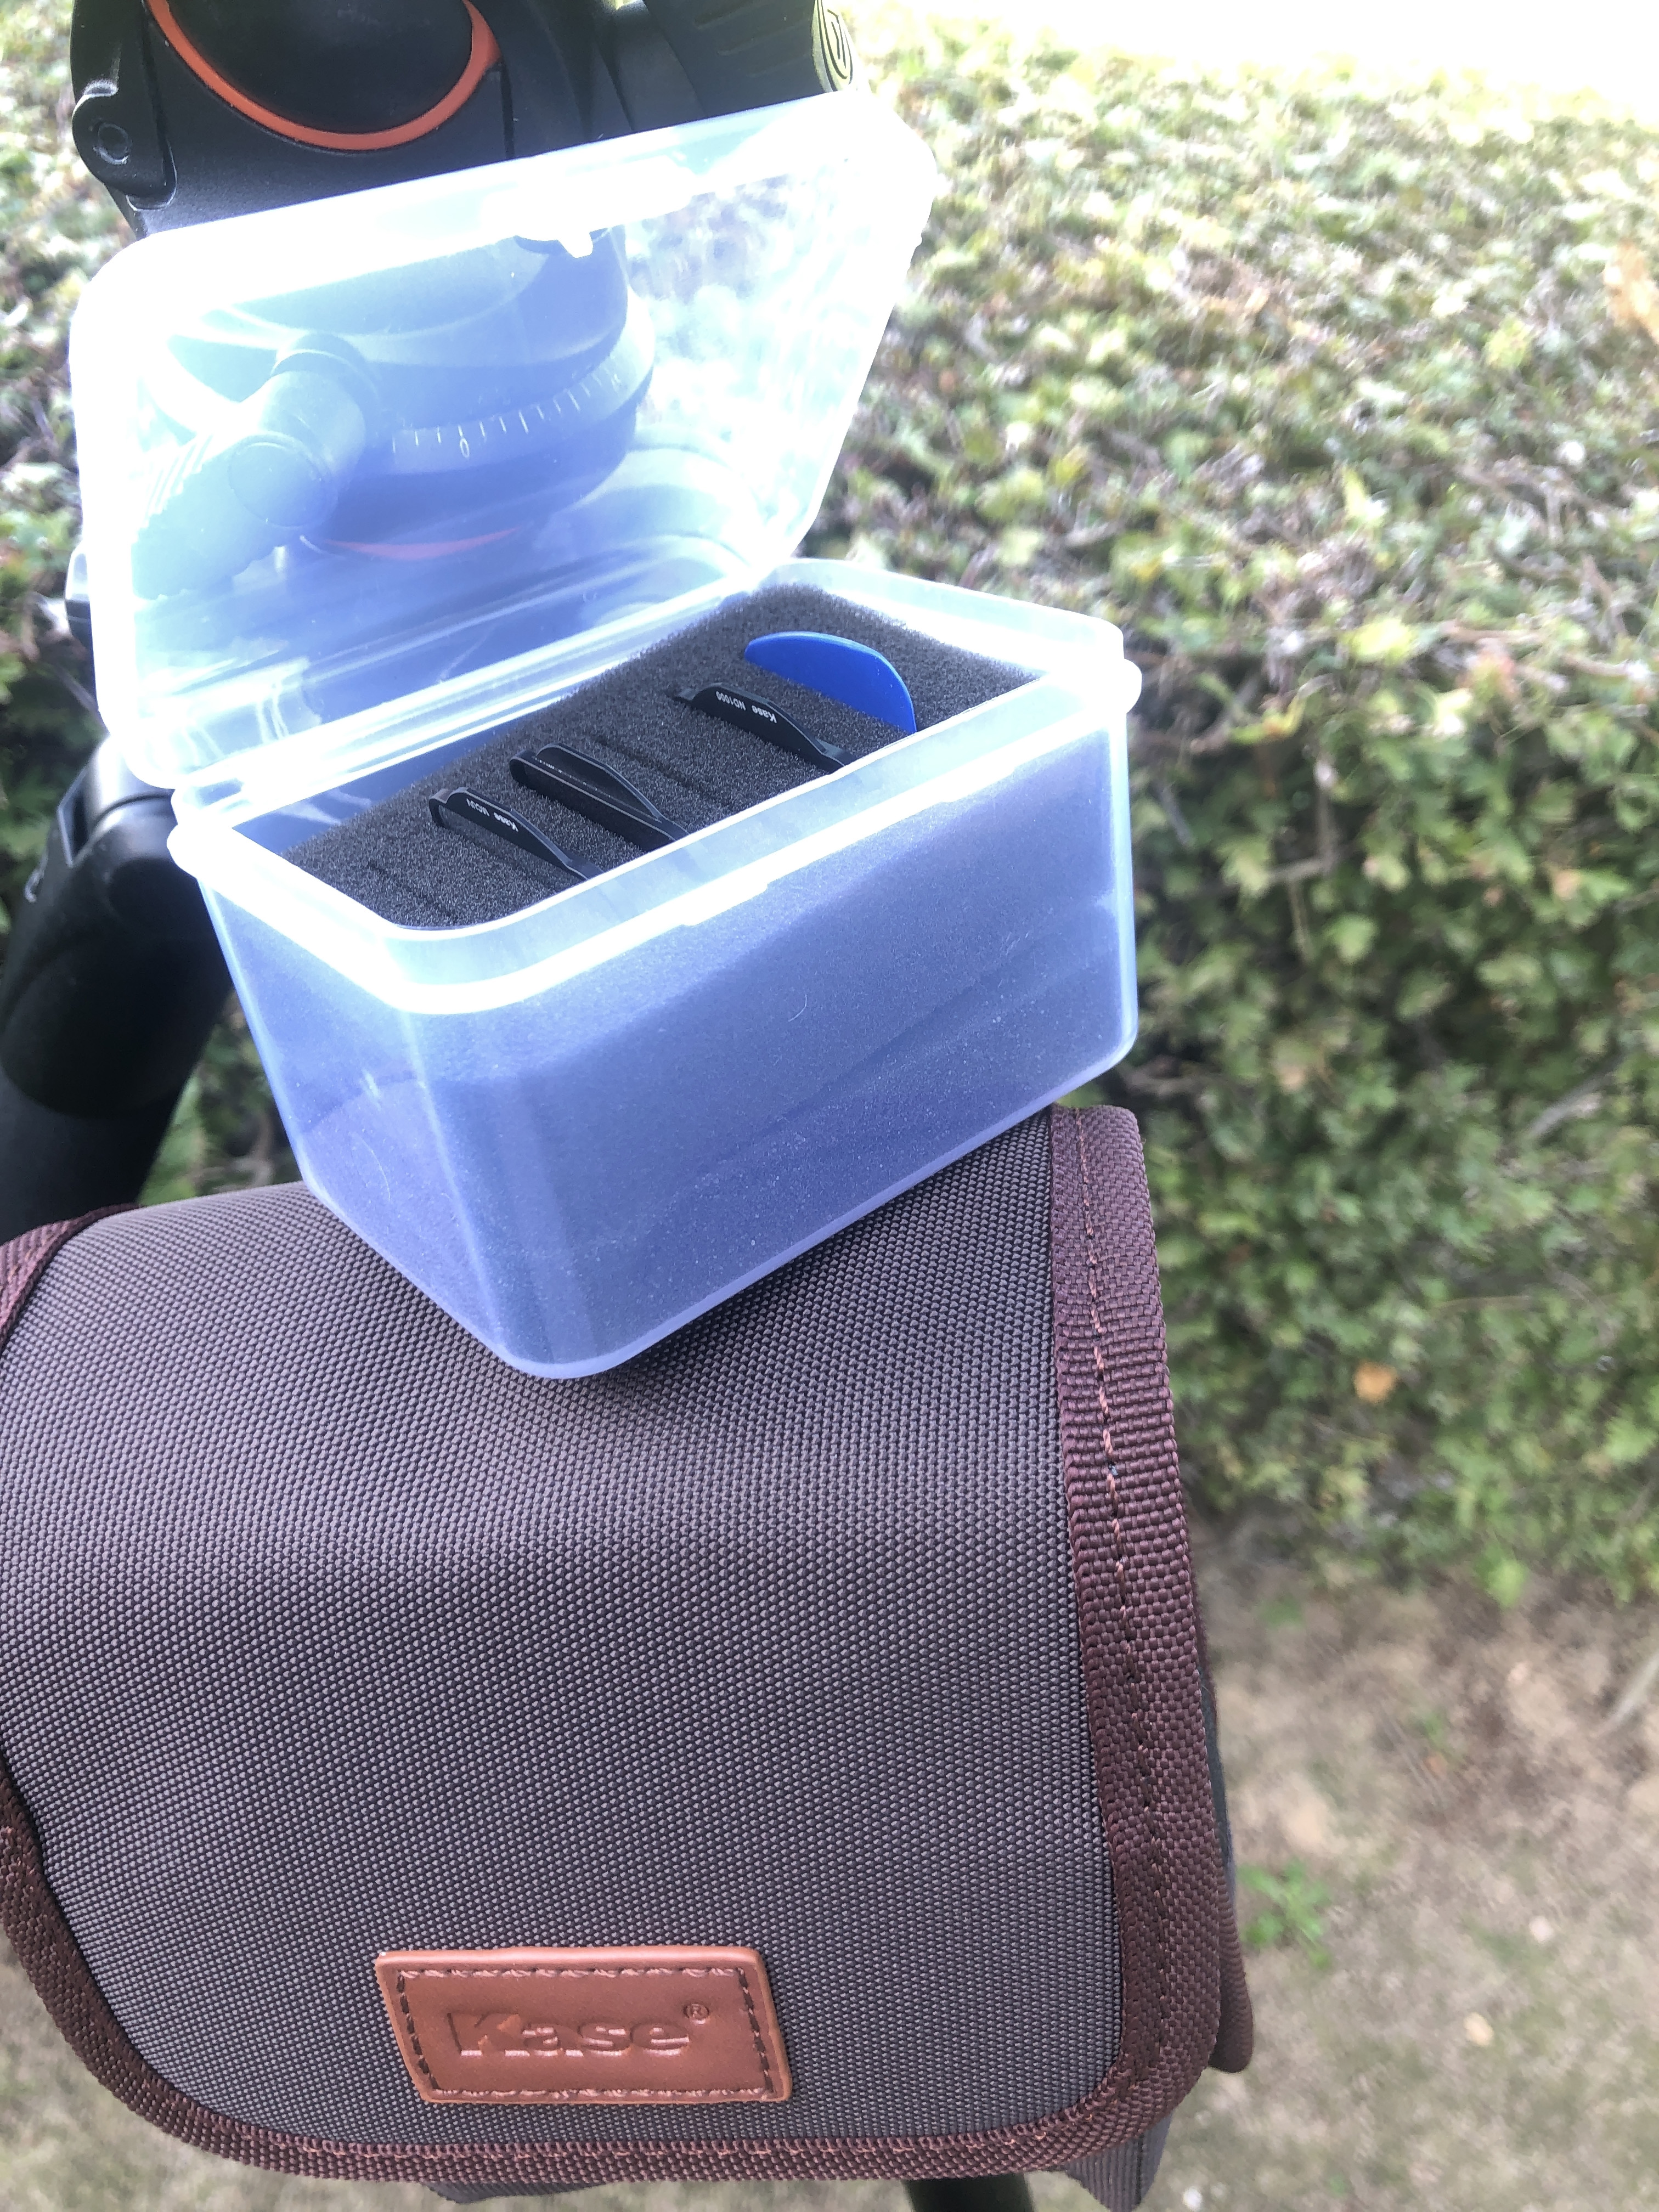
- Transparent plastic storage box (6 filter slots)
- Rubber finger gloves
- Plastic removal tool
- Cotton black gaskets
- Instructions for use

(the filter is very light when holding in my hand, only 3.3g)
When holding one of the filters in my hand, I was very surprised at its superlow weight. Honestly, it felt quite fragile. However, knowing that the filters are made from B270 optical glass I
assume they are not as fragile as they feel. Looking at the filters you can clearly see that they follow the shape of the frame around the camera sensor. On the bottom part of each filter the
filter type is printed.
(there are 6 filter slots in the storage box)
The plastic storage box has a foam insert with 6 filter slots. As this set contains only 4 filters, I assume more filters are to be developed at a later stage. It’s easy to put and remove the filters
from the slots. Actually, when aligned properly the filter names stick out a little, making it easier for you to pick the correct filter.
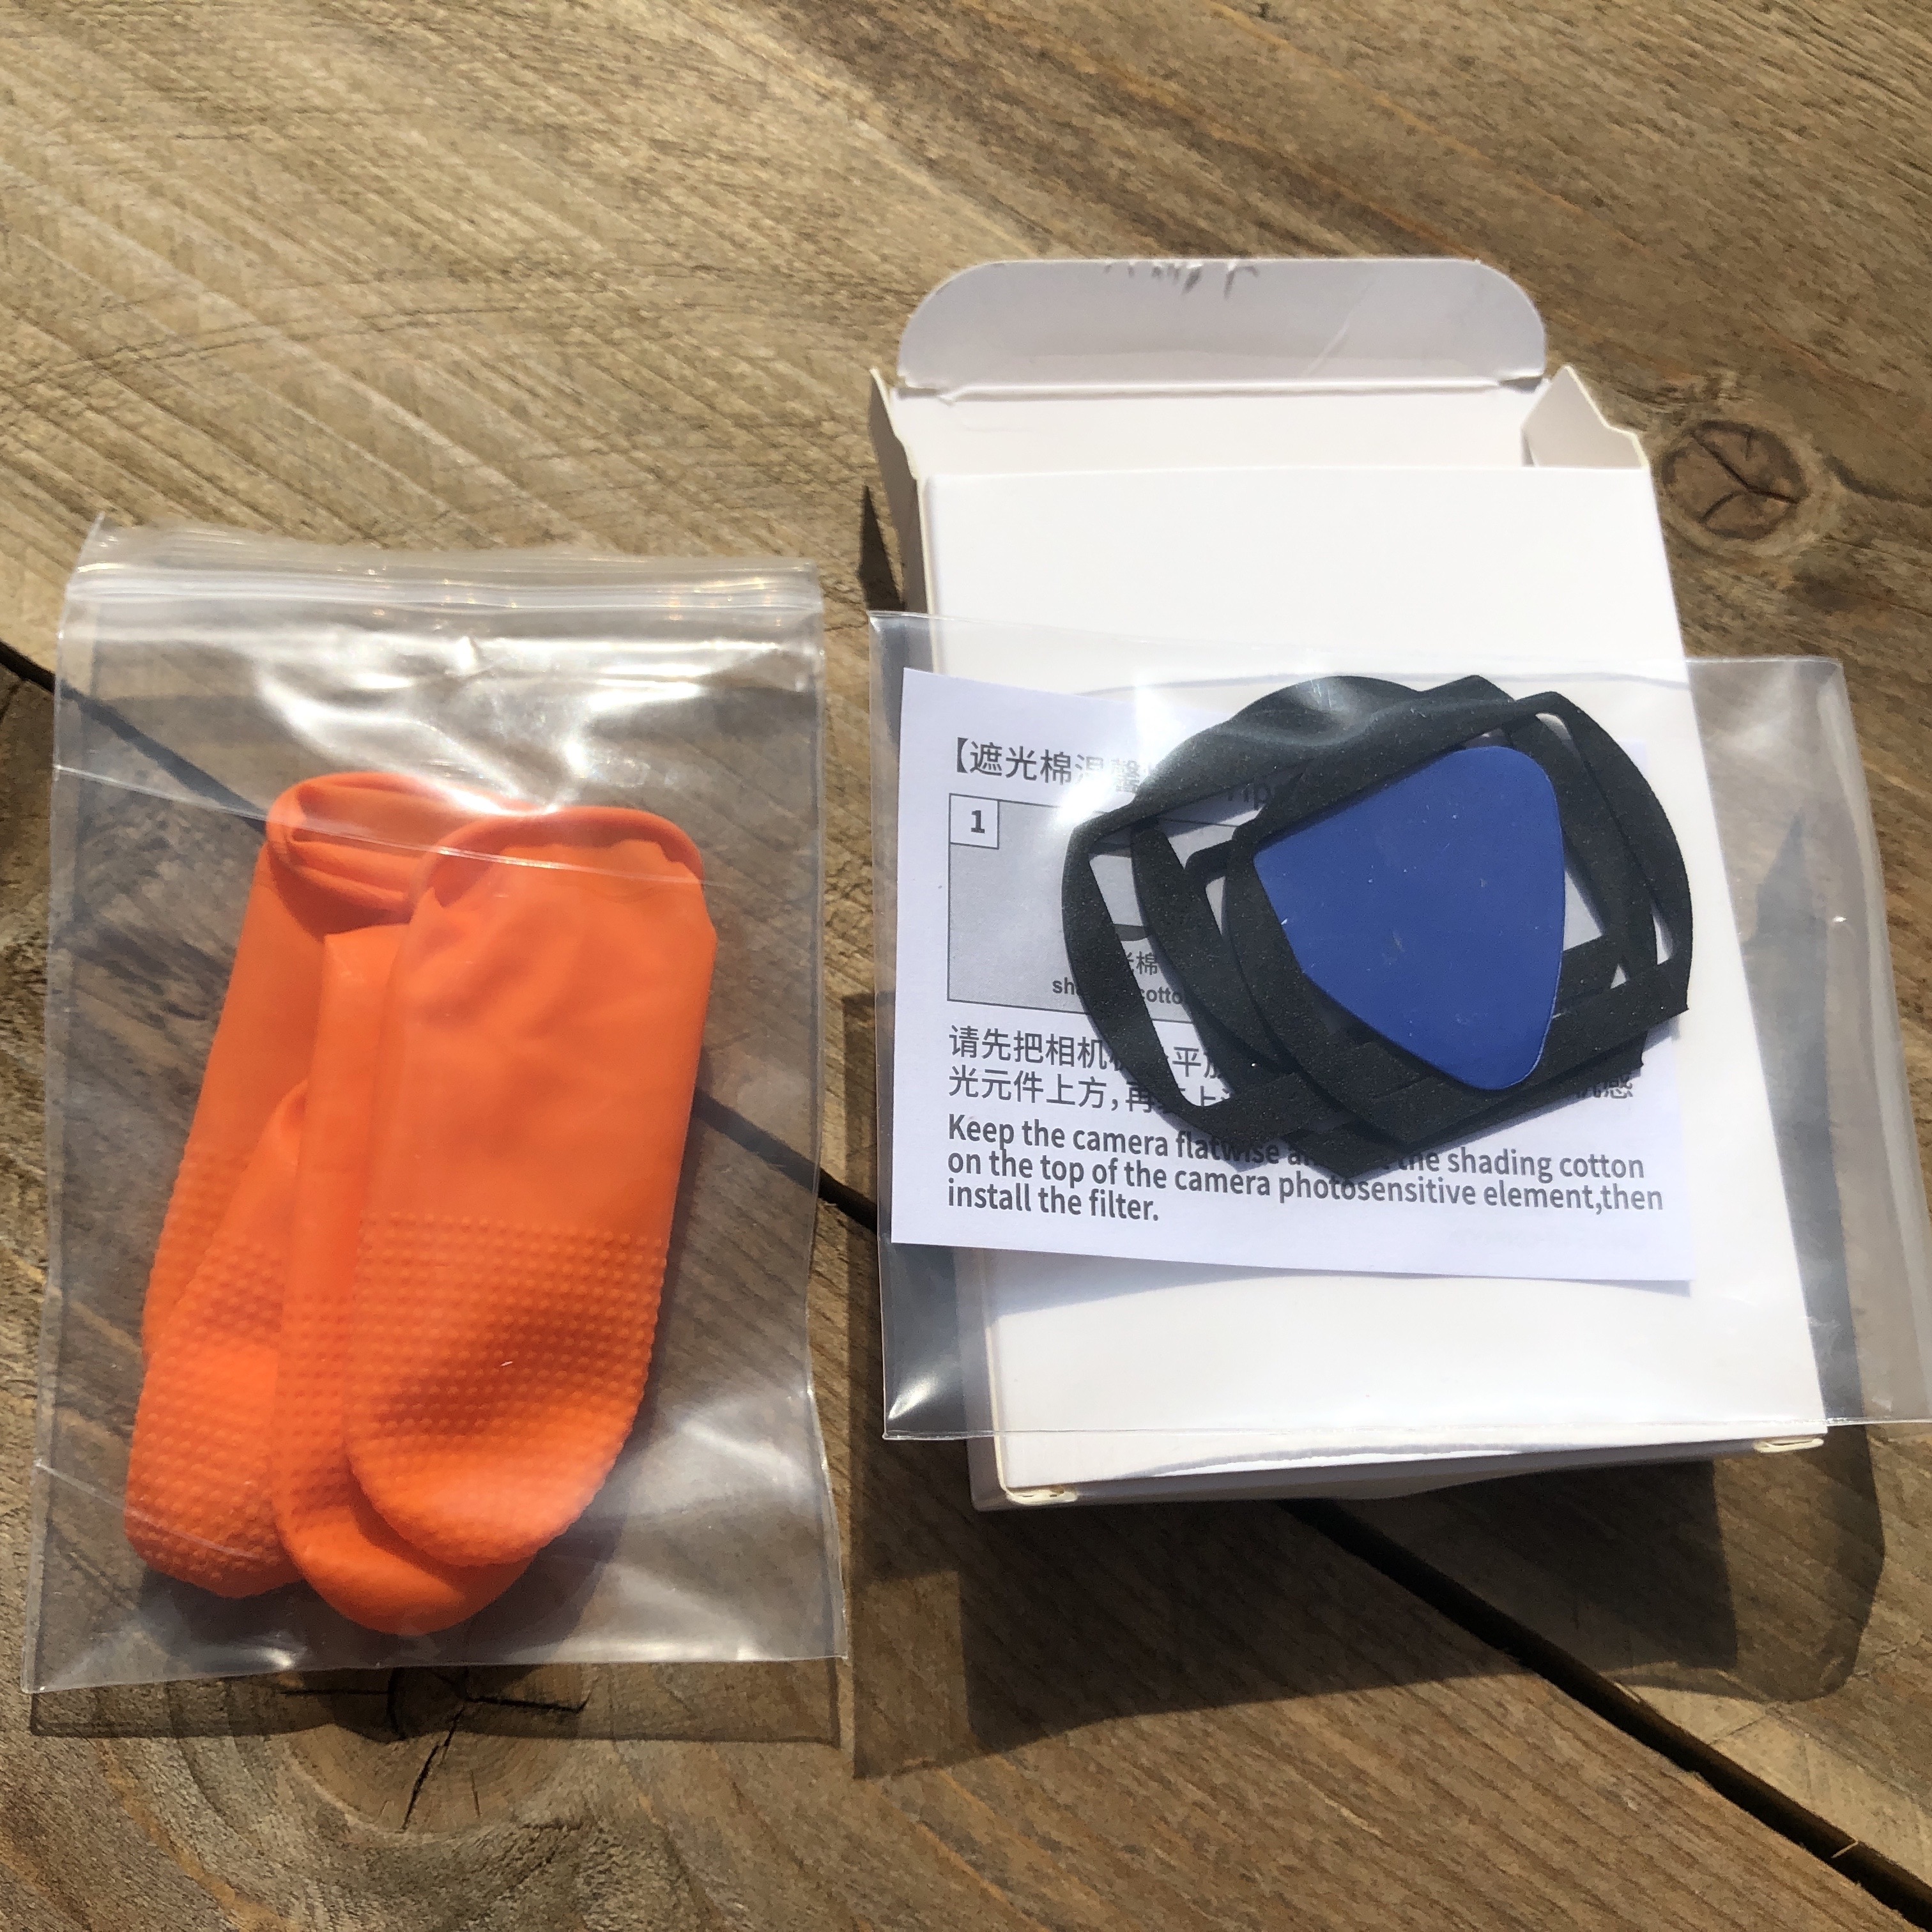
Also included in the package are a couple of black cotton gaskets. They are supposed to help prevent light leaks when doing long exposures. They are to be applied behind the clip-in filters to
properly seal any possible openings.
The included orange rubber finger gloves can be used to install the clip-in filters and prevent fingerprints on the filters. However, with a bit of practice it’s very easy to install a filter without
touching the glass.
The plastic disassembly tool looks like a guitar plectrum. It is used to uninstall the clip-in filter. It’s an essential piece of material, so you better don’t lose it. Remember the 2 empty slots in the
storage box?
The instructions for use give you a brief yet good insight in how to (un)install the filters. I preferred reading the installation instructions and watching the videos at KASE’s website.
Application
In this review I won’t go into detail about the exact installation instructions. They are very well explained on KASE’s website.
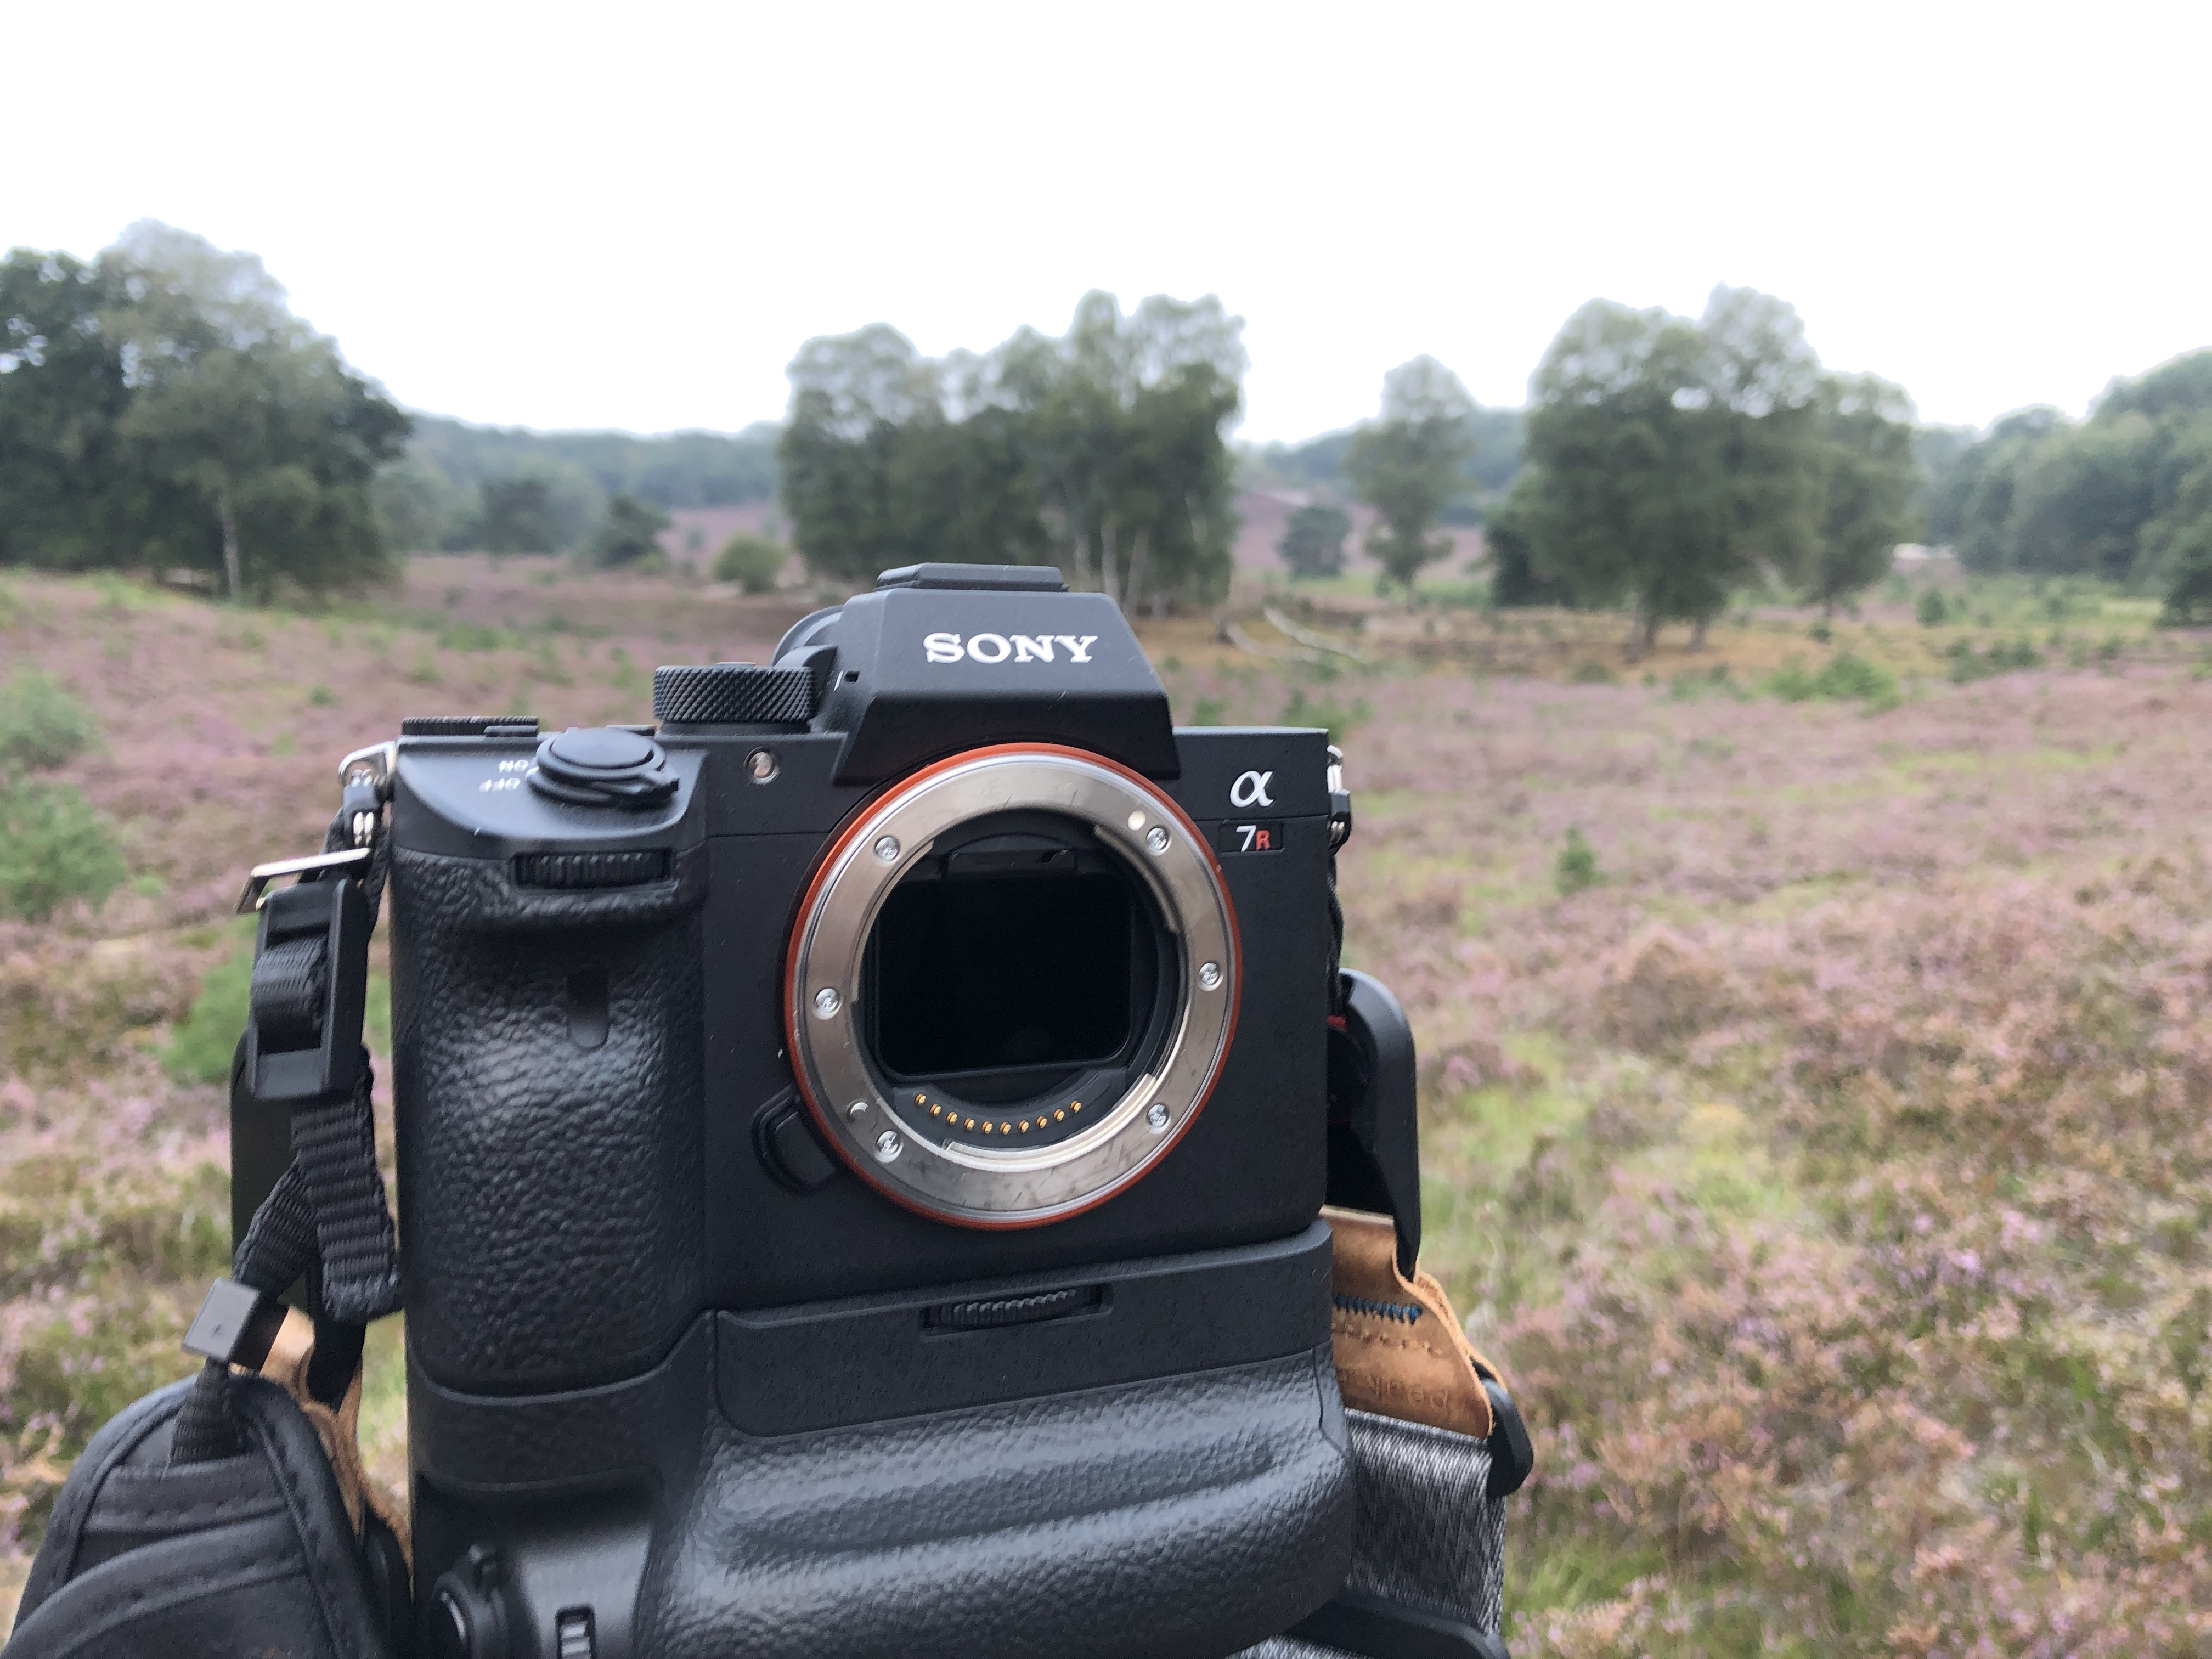
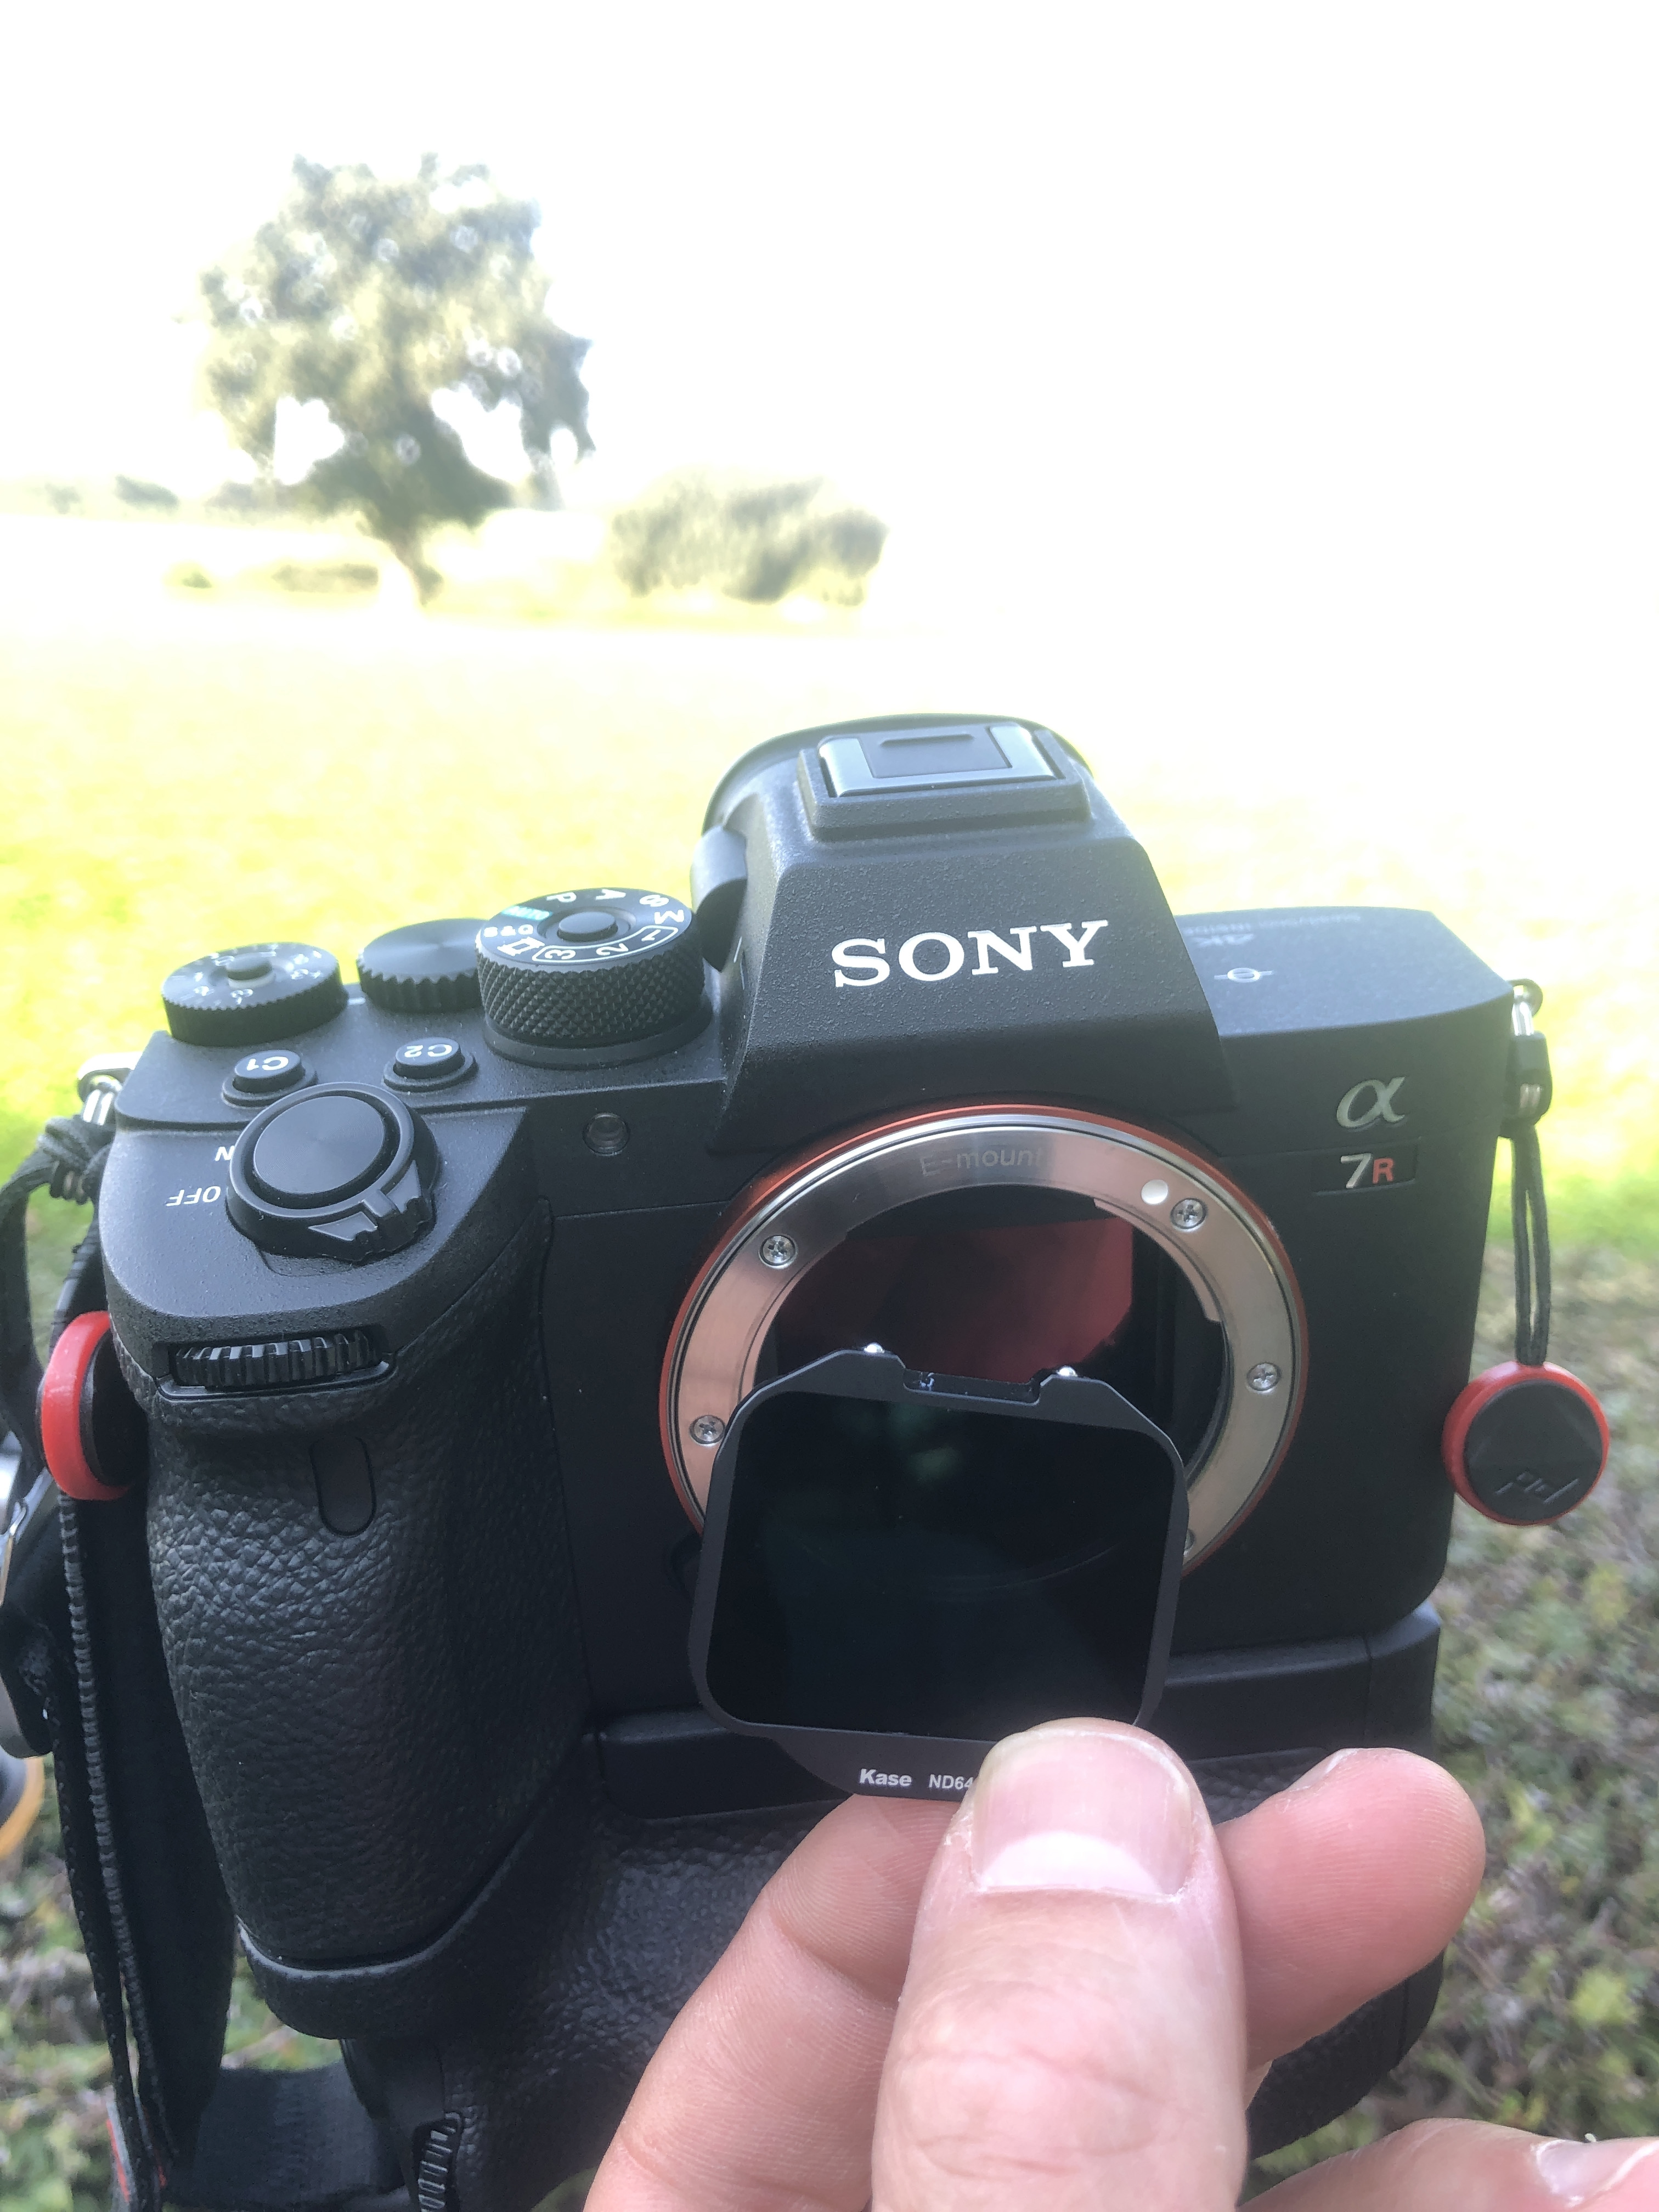
I must admit that I was a bit hesitant about using this type of filters. I was afraid to touch or even damage my camera’s sensor when installing the filter. However, after reading the instructions
and especially after watching the video, it was surprisingly easy to install the filter. Position the filter in a 45-degrees angle (with the KASE lettering facing the camera sensor), placing the tab in
the slot and push until it snaps into place. Don’t be too careful when installing the clip-in filter, gently position it and push until you hear a click. If the filter is not installed properly, it won’t be
possible to mount the lens on the body.
Removing the filter is extremely easy. Use the removal tool to pop out the filter using the small gap at the upper side of the filter.
For the sake of this review I tried to fit the cotton gasket. It needs a bit more practice to position it correctly, around the sensor and behind the clip-in filter. When inserted correctly it does seal
the sensor house. However, after his first time I never applied this gasket and I didn’t experience any light leak. In normal use you do not need to fit the cotton gasket, but if you are planning on
using the clip-in filters for extremely light sensitive long exposures, the gasket may help prevent light leaks on your sensor.
To protect the camera sensor, make sure that inserting the clip-in filters is done in a clean environment, protected from the wind.
First use
Normally using a mix of KASE and NISI square filters, I was very excited about trying out this new system. Living in the southern part of the Netherlands, 3 hours away from the sea, my first use
of the KASE Clip-In filters was during a sunrise shot at the Brunsummerheide when the heither was blooming.
(install the clip-in ND filter on the tripod in a clean sheltered place)
To get a feel for the installation, I already tried inserting the filters at home as to not expose my sensor too long when shooting out in the field. However I wanted to do a proper field test on a
chilly morning. I found a sheltered place, unmounted my lens, inserted the ND64 filter and mounted my lens again. It was done it less than 20 seconds. However, my camera was mounted on a
tripod, allowing me to use both hands. Not sure if I could do it in the field, without my tripod. But I guess you’ll bring a tripod anyway when using ND filters
Shooting went without any problems…initially. After 15 minutes my camera stopped working. It died instantly. Panic attack! Did the clip-in filters damage my sensor or some electronics in the
body? Did it break? Opening the body, uninstalling the filter it all looked fine. However, I had to end my user test and postpone until my camera was working again.
Note:
The photos I took with the filters (ND64 and UV) installed were crisp sharp and didn’t show any flare or colouring. The ND64 did it work and reduced the amount of light by 6 stops. Promising!
Can’t wait to continue the review and to get my camera back


Second use
Nearly 6 weeks passed. My camera has been repaired and the print plate has been replaced (even though I had no doubts, I felt reassured that the clip-in filters didn’t cause my camera’s break-
down!).

(second test with the Sony A7RIV)
Meanwhile I acquired a new camera, the Sony A7R IV. So, I decided to continue the product review using the filters on this camera model (so I can confirm the KASE clip-in filters work on both
the A7RII
and the A7RIV )

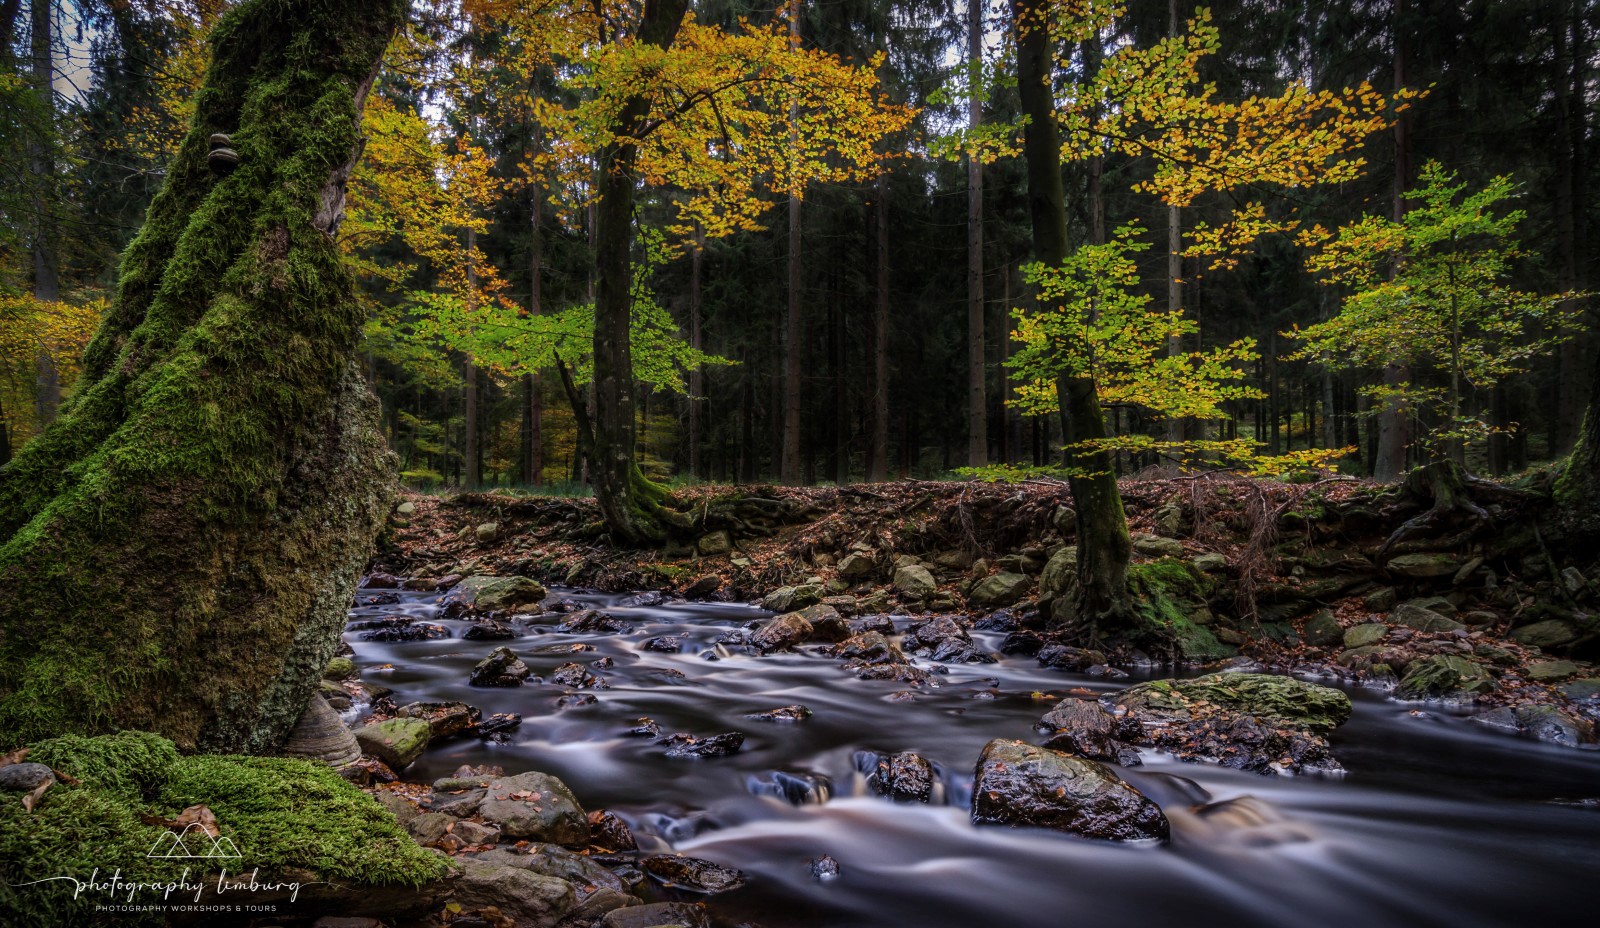
(dramatic sunset and beautiful antumn colours)
Autumn started, meaning sunsets got more dramatic and the autumn colours are getting more present. Good opportunities to continue my review.
Knowing the colours and sharpness of the filters were near to perfect in my first shoot, I decided to focus more on the really long exposure shots. This time I went to the Ardennes region in Belgium,
trying to photograph a stream running through an autumn landscape.
Long story short: the filters (ND64 and ND1000) did do their job, perfectly! I however experienced some minor challenges with my focus on infinity. I had to make minor corrections to get my focal
distance right. Since I am used to manual focussing, it was not a big deal for me. Being so close to the sensor, I assume the clip-in filters do impact the focal distance on your camera.
During post-processing, I couldn’t find any flares or undesired colouring. So KASE keeps their promise about the nano coatings on these Clip-In Filters.
Note:
On their own website, KASE states:
Using clip-in filters will adjust your focal distance and focusing system on your lens. This will not cause you any issues in manual mode if you focus via screen or LCD or auto-focus modes. If however
you use the focal distance markings on your lens, they will be different. For example, infinity markings will not be accurate on lenses, and you will need to focus manually to account for the adjustment.


Verdict
The KASE Clip-in filters are a real innovation! They are extremely light weight (only 3.3g), have an outstanding clarity (because of the B270 optical glass) and are very compact. Pictures I took with
these filters inserted were sharp and didn’t suffer from lens flare or colouring. Installation is easy but needs a bit of practice to do it out in the field.
But why would you need filters so close to your sensor?
Do they improve image quality? Are they easier to apply than screw-on or square filters? In my opinion the answer to both questions would be “NO”.
Regardless of KASE’s advice about the minor changes of the focal distance and focussing system using the KASE clip-in filters certainly offer many significant advantages!
- They are compatible with all series Alpha 7 and 9 cameras ánd with all lens combinations, no matter how wide. This means that you don’t need to replace or change your filter system or use
- adapter rings when changing lenses. The filter will do its work, regardless of the mounted lens.
- When changing lenses, the clip-in filter does protect your sensor. This mainly applies to the UV-protection filter.
- They are extremely compact and light weight. If you want to hike or travel light, forget about the screw-on and square filters. The KASE Clip-in filters are the solution!
- Especially if you are working with screw-on filters, you should buy a separate filter for each lens (filter) diameter. When using the KASE ND or UV clip-in filters, this is no longer the case.
- When using screw-on filters, stacking these filters is not a good idea. It will be difficult to use your Cir.Pol. filter and it will significantly increase your chances of vignetting and lens flare. When using a
- clip-in filter, you can still use another filter on the front of your lens.
- Value for money when compared with high quality alternatives.
- All the filters have a waterproof and oil-resistant nano coating.
I will continue to use the KASE Clip-In filters in cases where I will shoot long exposure shots, without the need to change the clip-in filters every couple of minutes (as to not having to expose the sensor frequently).
I like the fact that I can continue to use my square filters in addition to the KASE Clip-In filters.
Written by:
Jörgen van Beem, Photography Limburg
www.photographylimburg.com
October 2020
Scan the QR code to read on your phone